(( Buckle )) Lark's Head Knot and Barnacle Knot Buckles
Variation on the Bracelet Buckle - Made With Mixed Knots
Introduction
This tutorial will show you how to start your bracelet with a simple, quick buckle that can be used with any pattern.
For the first two variations. The buckle is started from the center of your strings with a Larks Head knot, and is made from one of the strings in the pattern.
Note: The Larks Head knot that begins the center, is indistinguishable from a BF or FB (Backward-Forward or Forward-Backward) after it's tied and snugged. Then the buckle is completed tying alternating Forward and Backward half-knots (essentially FB or BF) knots--to finish the buckle on both sides.
The Barnacle knot buckle is simply a string of FB knots tied around the bundle of strings. It starts at one end of the buckle, rather than in the middle. It is indistinguishable, once tied, from the first two variations. The difference lies in the method. Also, the Barnacle knot can be anchored by pulling the end through the "buckle tunnel" with a pull string. This allows the buckle to be made with a completely separate string or an integral pattern string.
The buckles can be finished in either open or closed versions. Open buckle . . . the ends of the buckle feed directly into the bracelet knots. Closed buckle, the bundle of threads are gathered and the buckle shaped into a teardrop shape. The bundle can be anchored with decorative square knots.
Variation 1- even number all strings in pattern, buckle uses a pattern string
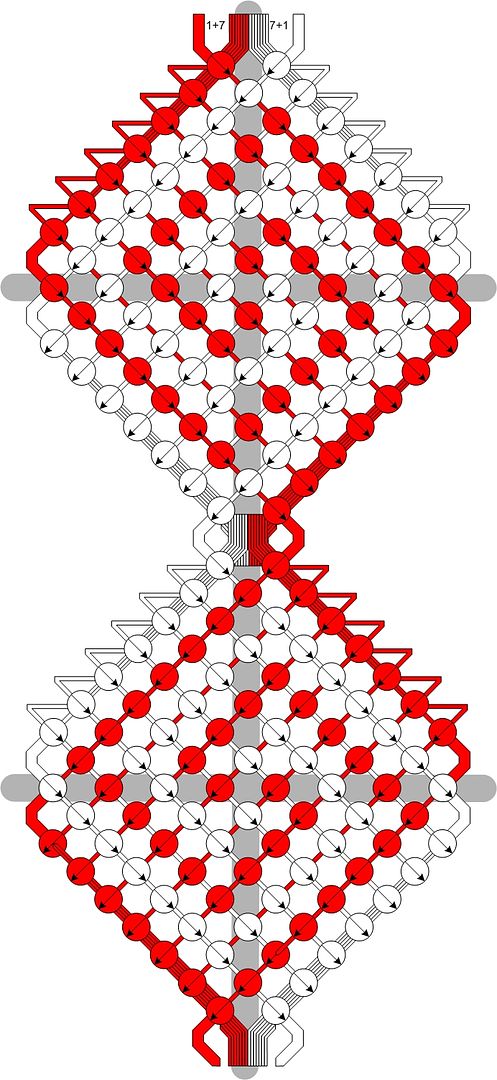
I will be making pattern 58637
Step 1
First cut your strings to desired length, making the one you want to use for the buckle about 8 inches (20 cm) - 13 inches (30 cm) longer. Usually I choose the edge string for the buckle. In this case, that would be colour A.
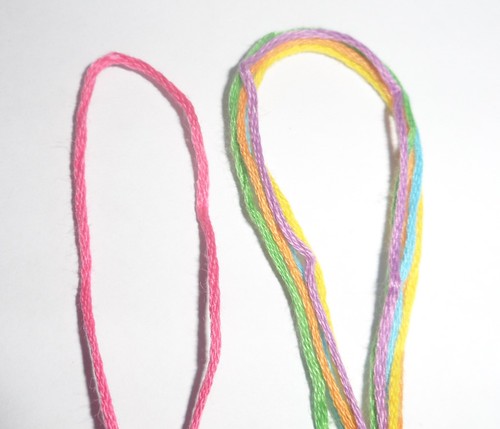
Step 2
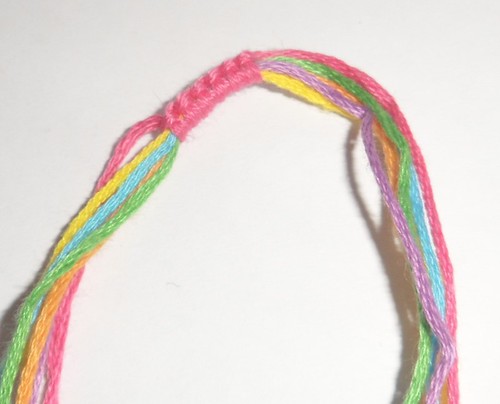
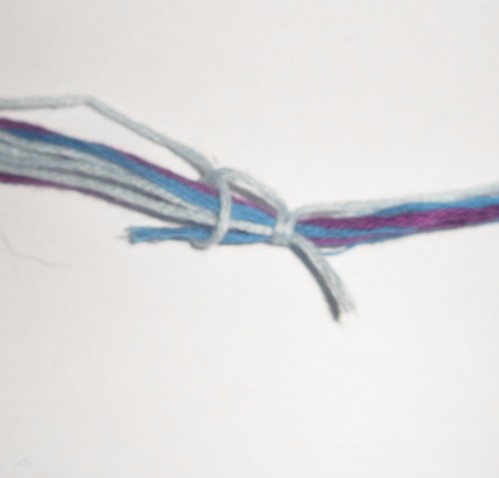
Once your strings are cut, fold them in half and make a lark's head knot.
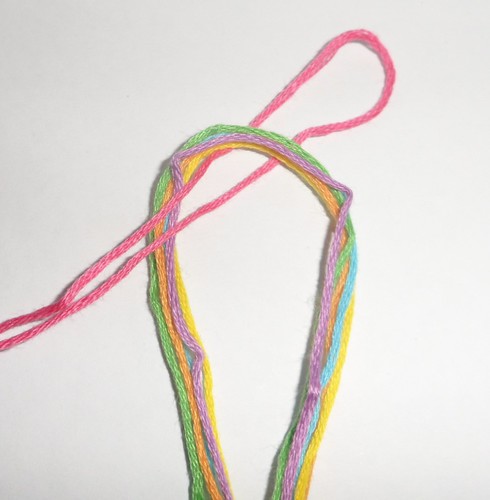
Step 3
Now you have the middle/start of the buckle done. Starting on one side, alternate doing forward half hitches and backward half hitches for about half an inch. A half hitch is half of one knot you make in normal patterns.
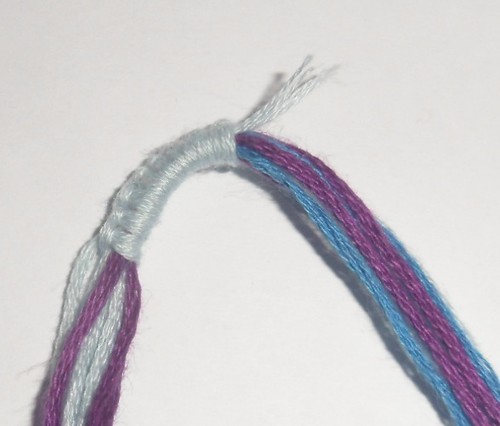
Step 4
Then, do the other half using the same technique until you get the desired length. Of course this will be larger or smaller depending on how large the pattern is.
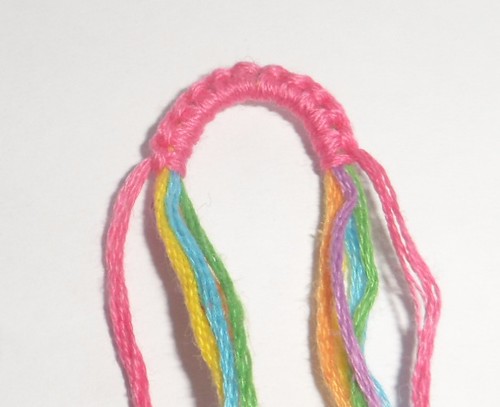
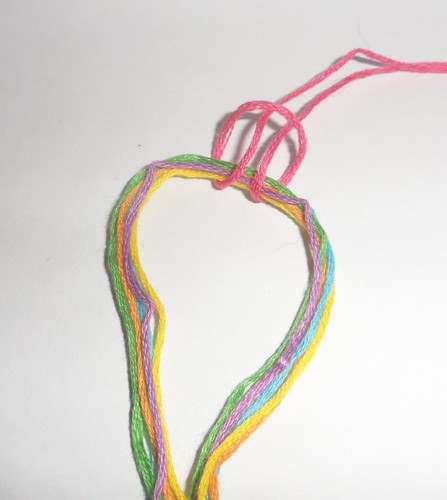
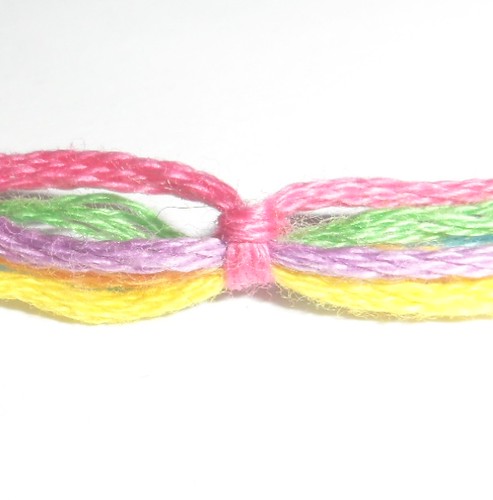
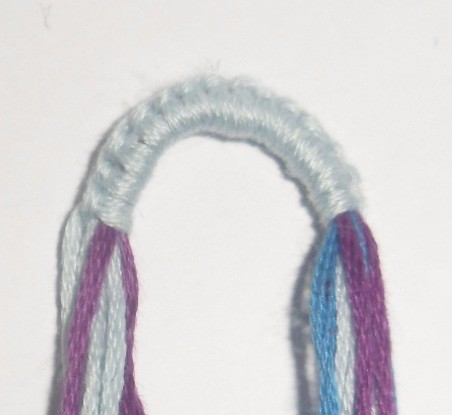
Step 5
Your buckle is complete! Fold it in half and begin your bracelet. You can use Foz's tutorial if you need help making a straight first row.
Variation 2-Loose strings, buckle uses a pattern string
How to seamlessly add single strings to the buckle
I will be making pattern 2112
Step 1
First cut your strings to desired length, making the one you want to use for the buckle about 8 inches (20cm) longer. This pattern has an uneven amount of colors A and C, so I cut half the amount I would normally to fold it plus an inch to hide in the buckle. Usually I choose the edge string for the buckle. In this case, that would be color A.
Step 2
Once your strings are cut, fold all the longer strings in half. For the loose half strings, place them about an inch past the halfway mark and make a lark's head knot including them. (If you do not know how to make a lark's head knot please look above.)

Step 3
Now you have the middle/start of the buckle done. Starting on one side, alternate doing forward half hitches and backward half hitches for about half an inch. A half hitch is half of one knot you make in normal patterns. Make sure you go around the loose strings!
Step 4
Then, do the other half using the same technique until you get the desired length. Of course this will be larger or smaller depending on how large the pattern is.
Step 5
Your buckle is complete! Fold it in half and begin your bracelet. You can use Foz's tutorial if you need help making a straight first row.
Barnacle Knot Buckle, technique with more options.
The barnacle knot is essentially alternating half hitches (Forward-Backward or Backward-Forward Knots) that are made over a core that is either already in a loop, or will be made into a loop later. This buckle forms a teardrop shaped eye that can be used for a button or with a single braid finish. Another alternative is to make the loop small enough that a double overhand knot in the cord at the end can be a ball shaped button.
To buckle with a single braid, the braid is fed up through the buckle, around the neck and back down the hole to form a secure, easily adjustable connection.
Any bracelet's pattern can be started with a bundle. Then shaped out to the pattern width using the methods shown in the Shaped Circle Bracelet Tutorial. A taper to finish can be done like the bottom half of the pattern.
To start, decisions must be made.
How many strings, think before you cut them and lay them out, options:.
a)Barnacle Knot--totally separate string.[/h2]
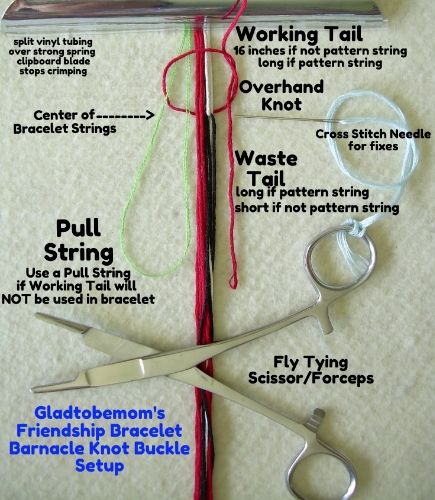
The Barnacle Knot can be made from a totally separate string. It will be secure on its own. It does not have to be made from one of your pattern strings (though it can be). String for the buckle and a pull string loop will be needed. For the pull string, I tend to use a doubled sub-strand of waste floss, looped and tied into a circle with a fat knot . . . that way I can't possibly lose the end.
How much floss do you need for the actual Barnacle Knot? 16 inches is generous for most bracelets. You can actually calculate it:
Circumference of buckle desired x 6, then add 4 inches for margin. So, for a 2 inch length of barnacle knot, making a teardrop just under an inch long, 2x6+4=16 inches. If you are like me, then you have lots of lengths like this around, too long to toss and too short for a bracelet string.
If you are making the Barnacle knot with a separate string, just leave any "half" or "odd" strings for your pattern long enough so its tail goes all the way round the buckle in the core bundle. The tight buckle made from a completely separate string will hold it. You'll snip them after the buckle is finished, just before you bend it.
[h3]b)Barnacle Knot String--One End used in Pattern
One End of Barnacle Knot String can be used in the bracelet pattern. Cut your Barnacle knot string longer than usual to accommodate the buckle knots (16 inches or calculate as just above). Lay it so that it crosses the center by more than the length of the buckle. The long end will be used to tie the Barnacle Knot; its short Waste Tail (other end of the string) will be hidden and secured under the buckle.
c)Barnacle Knot String--Both ends used in pattern.
Both ends of the Barnacle Knot String can be used in the bracelet pattern. For this, line one end of the string up with the others, the other will be longer (by about 16 inches . . . that will be your working tail string for making the barnacle knot. Do NOT center this string, Leave it 16 inches longer on the "Working Tail" end.
d)String is very slippery or of mixed types.
Accommodations should be made when using slippery or unpredictable string. Some situations:
-- floss, such as Silk, Rayon, etc. Can be very slippery. Rayon floss, which is super shiny, wears great, and is terribly slippery. I've also mixed multiple strands of metalic, sparkly prism strands, or glow in the dark thread in with my floss.
--Several strands of machine embroidery thread makes a great "fake" floss, but it does tend to scoot.
--Fine rattail (satin cord) through a bracelet to pop out as part of a flower, bow, or leaf because it sort of fluffs up.
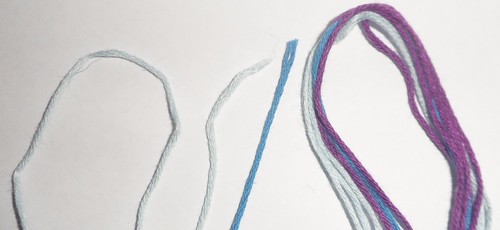
For situations like these, minimize the likelihood of the threads scooting around, by interlocking them in single pairs. If you look at the photo below. You'll see that a double length black cord and a double length white cord are actually folded through each other and doubled back. The little "bump" formed is not noticeable in the final bracelet, but wrapped under the snug Barnacle knot, they will not slip.
If you have "short" strings, don't feed them straight through the buckle. Fold them back and interlock them individually through one of the other cords that has been doubled back on itself near the center. Two Odd strings can be interlocked (folded back through each other); just leave enough of a tail on each so it can be clipped after the buckle is done.
When you fold/interlock the strings, stagger the bend locations a bit, so they are not all on top of one another. Also, always do them in individual pairs. Don't fold 2 strings together on one side and loop one or two through them--you'll get a noticeable bump.
Set Up & Make the Barnacle Knot Buckle.
What you see below is everything I use to make bracelets. No glue, or other stuff. The only thing consumable is the string in the bracelet.Lay out your strings, Clamp, then tie on the Barnacle Knot String
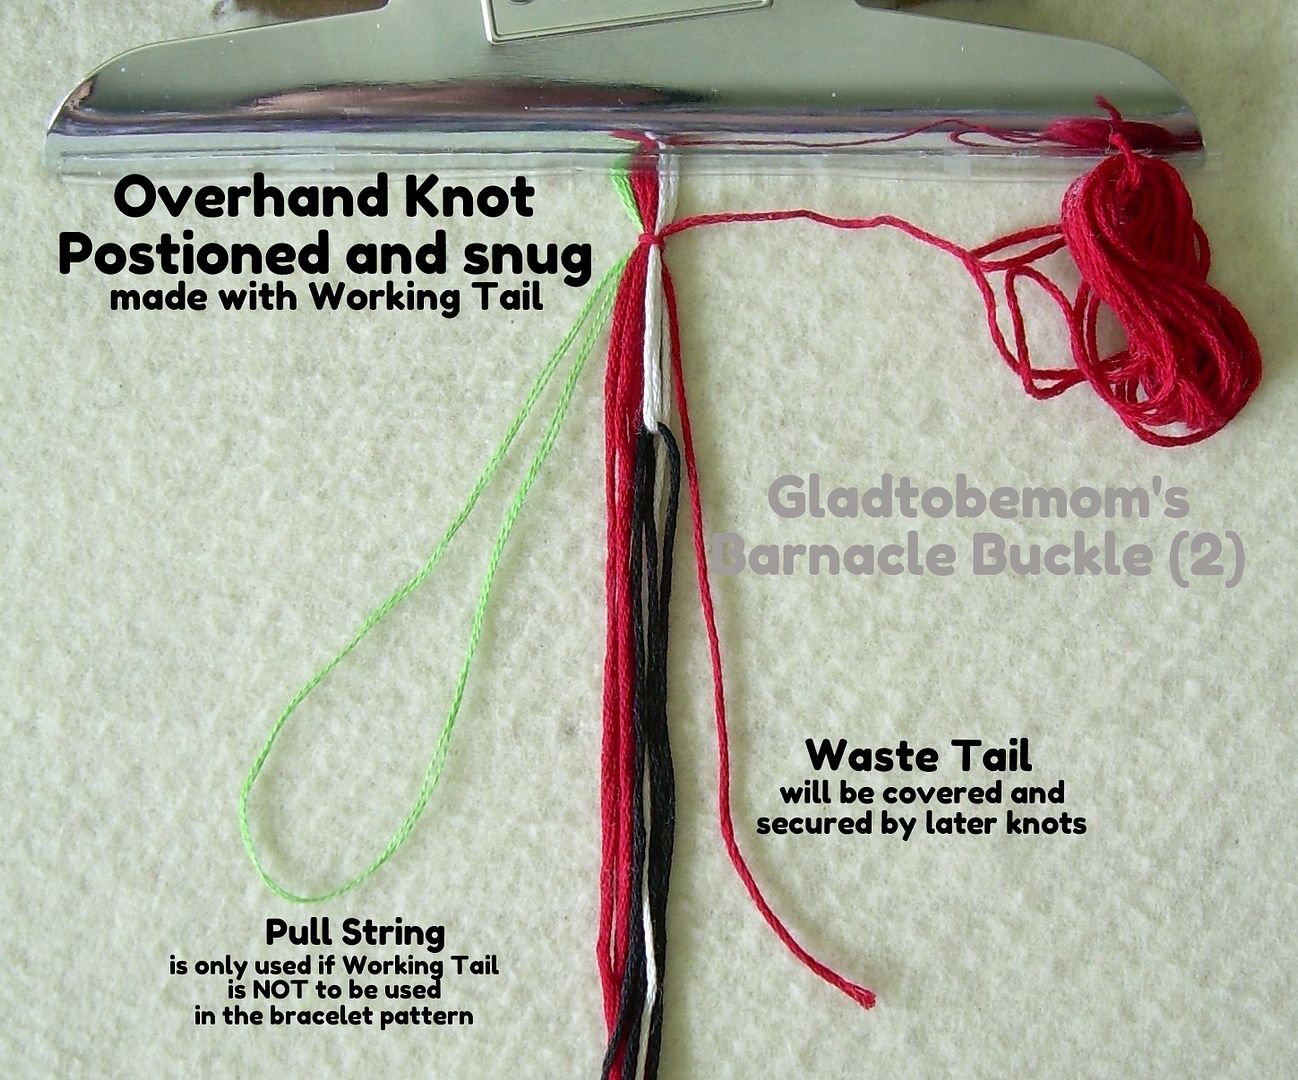
Mark the center in some way (I usually stick my needle in the felt at the center point temporarily). Then line up your barnacle knot string and make an initial overhand knot with the working end going "up" and the Waste Tail going down (this waste tail could be as long as your other strings if it's to be part of the bracelet pattern).
Snug and Position the initializing overhand knot.
In the example, I wanted an eye that was just over half an inch. So I placed the overhand knot just a bit more than a half inch above the center. Snug it down.Now is the time to take a breath and double check all your strings, Have you got all of them? Are they lined up well? Did you accidentally lay out twice as many as you needed? (it happens)
 [/URL]
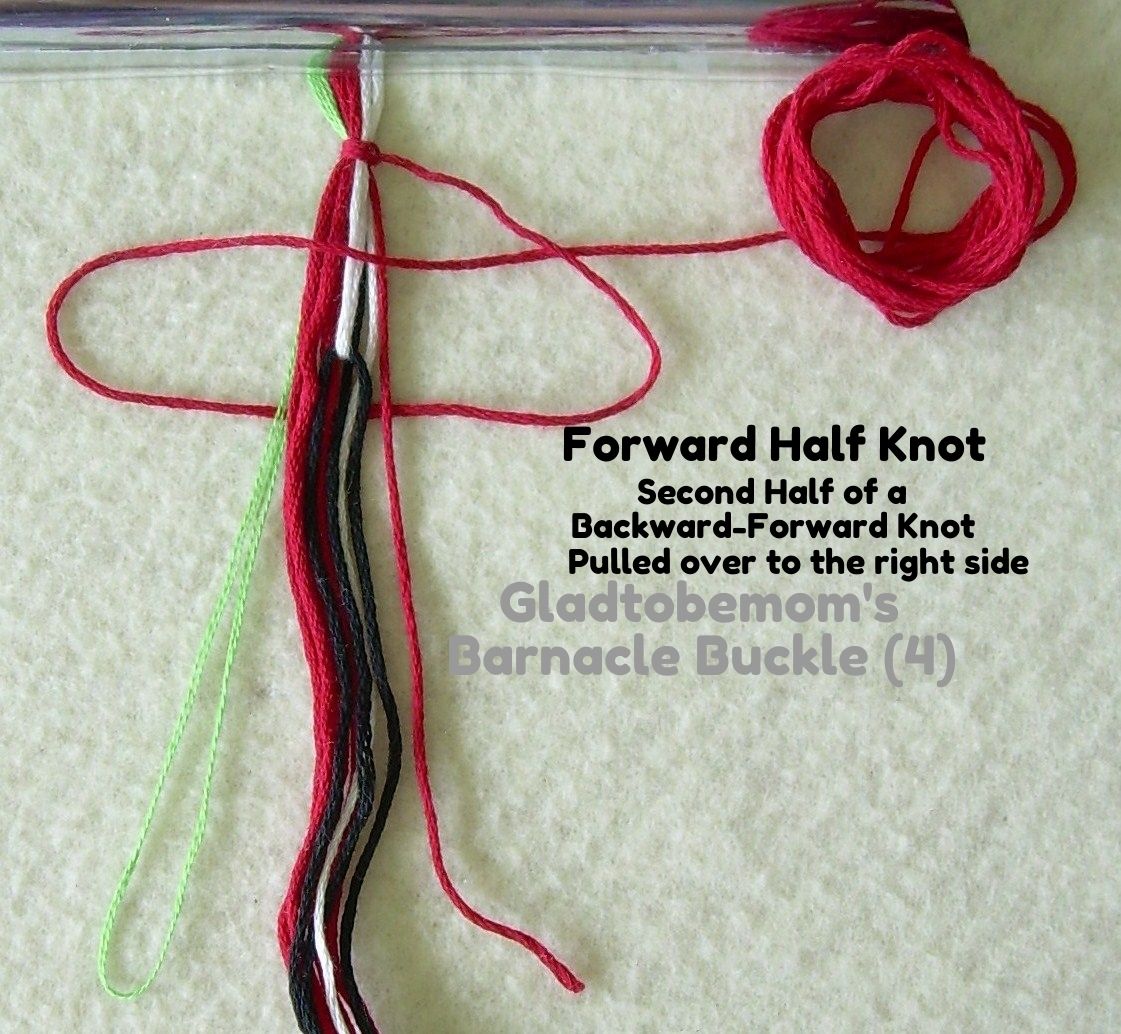
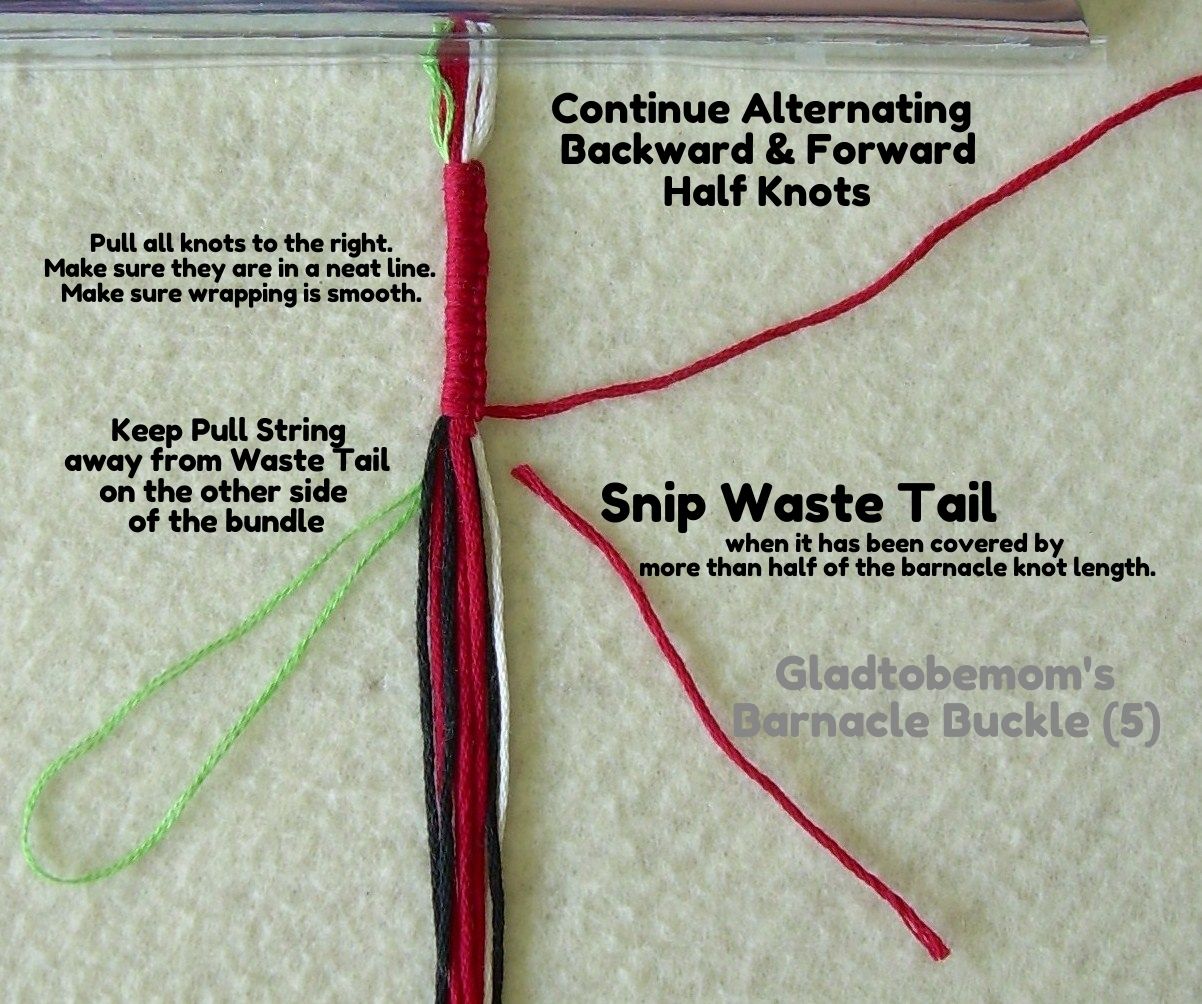
Proceed with Backward Forward Knots,
pulled to the right side. Keep them well aligned and make sure the wrap is smooth, not overlapped, and no gaps.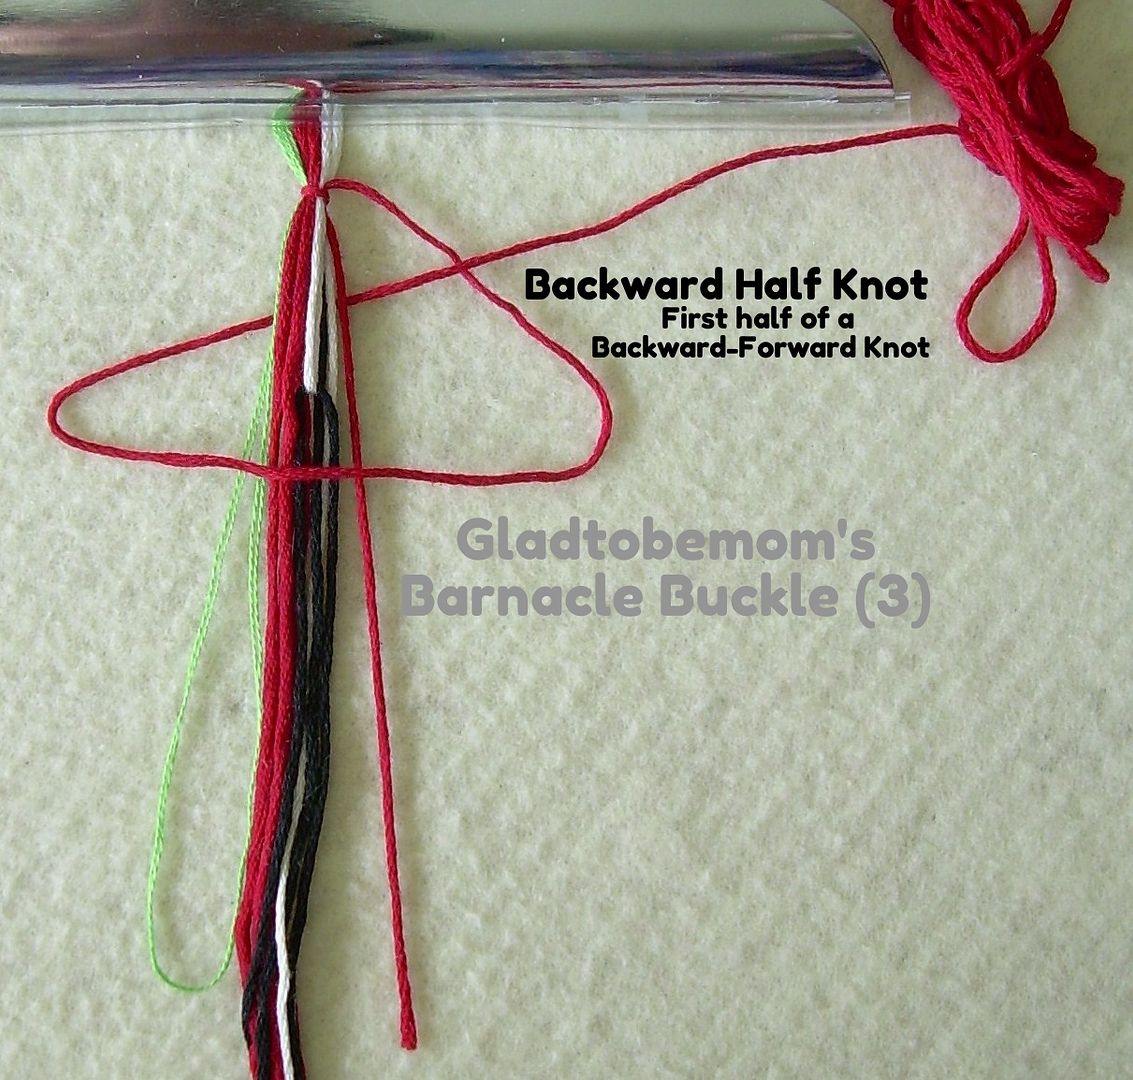
Snipping the Waste Tail
Cut the Waste Tail string Only if it is NOT going to be used in the pattern. When past the center point, snip the waste tail if you are not using this string in the pattern.
Continue with the BF knots till long enough.
Test your barnacle knot by folding it in half with the bumps outward. When it is the size you want, stop knotting.Securing the Working Tail, (using the pull string)
(skip if the working tail is going to be used in the pattern of the bracelet.)
If the working string is NOT joining the bracelet pattern, then you will use the pull string to secure and hide the end.
Put the end of the Working string into the loop as shown below. Be sure to leave plenty of slack.
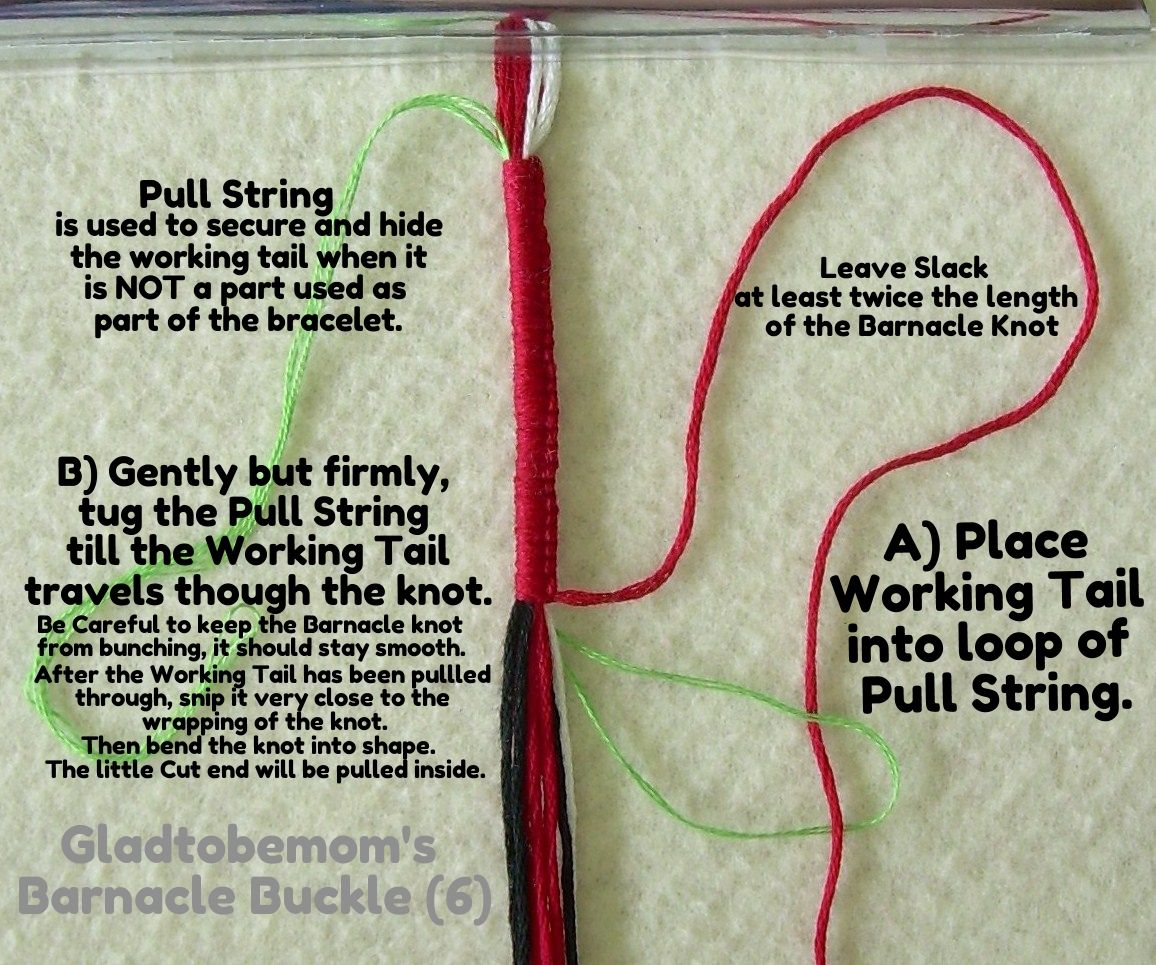
Support the barnacle knot with your fingers while you pull the working string through the barnacle knot and then snip it off. Be gentle and go slow so that the wraps won't bunch up.
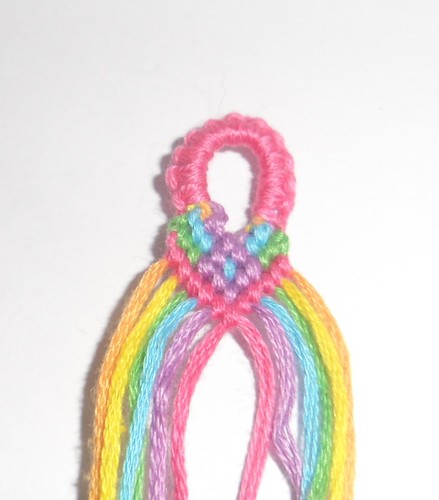
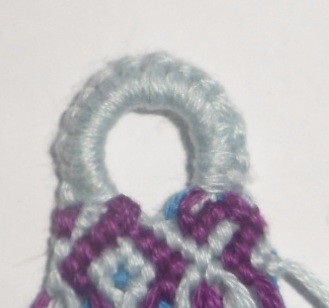
Now finish off your Buckle
Bend it into shape. At this point you can choose to just start your bracelet pattern (as shown below in the open version of the buckle). Alternatively, pick up two of your pattern threads on opposite sides and do some Macrame square knots around the bundle. (as shown in the closed versions)
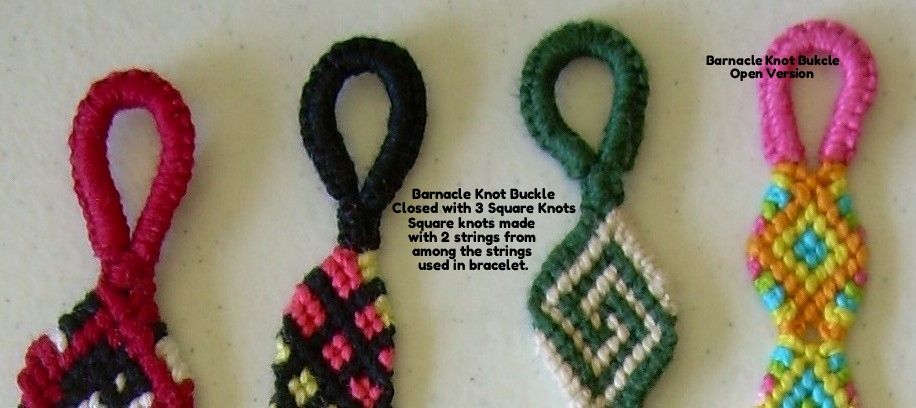
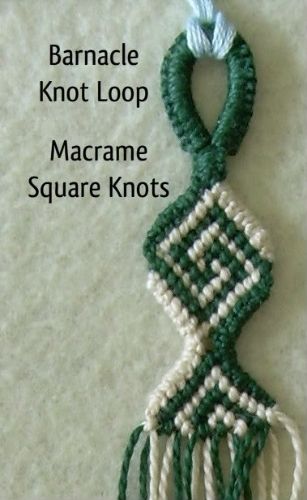
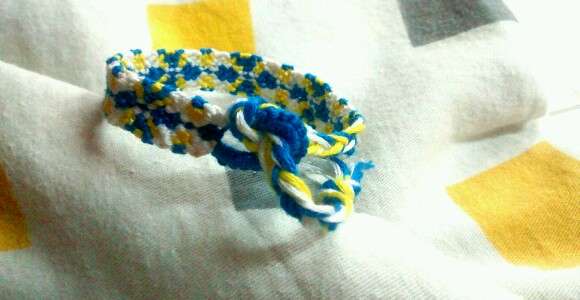
Macrame Square Knot Neck below the Buckle
I find that if the Square Knot neck is just a little narrower than the braided tail, the bracelet stays buckled well.
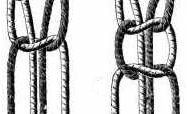
Note: this image is from a book by Theresa Dillmont, The Encyclopedia of Needlework (out of copyright, available at the Gutenberg Project site)
Some things to think about.
If you want to start with a shaped end, just take your pattern and pick a spot to start. Draw an inverted V on the pattern. This will tell you the order of your strings. Here are links to my pattern drafts for the
Shaped Yin Yang
Shaped Greek Key
Shaped Circle
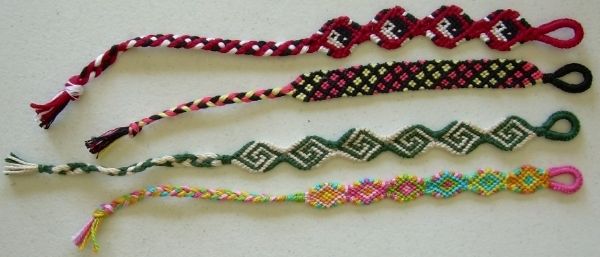
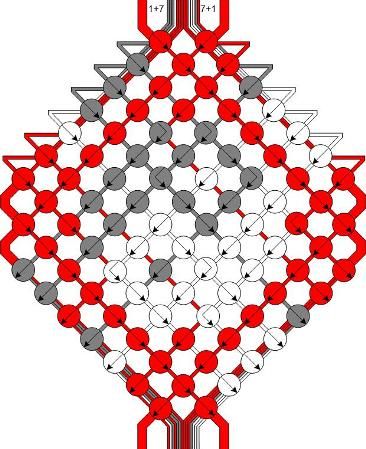
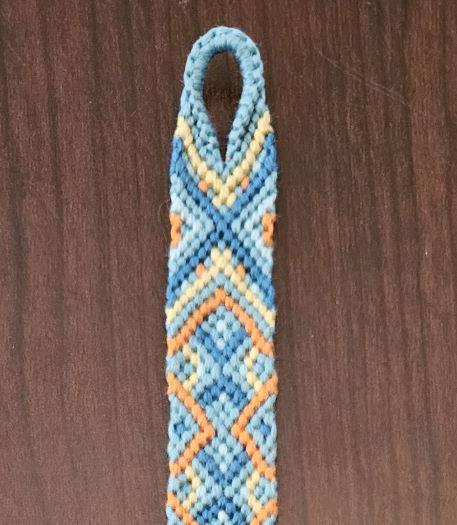
The other pattern shown on this page is Pattern #48256. I did taper the start and finish of this pattern.
If you are shaping/tapering the beginning, end, or whole bracelet. It's useful to view the Shaped Circle Tutorial.
There is also a general Shaped Bracelets With Patterns Tutorial that deals with other aspects of converting a pattern.
I can't, in any way, claim to have invented the Barnacle Knot buckle. Years ago (sometime around 1972 when I was 11) I saw it in a Seaman's Skills and Hobbies (paraphrased from memory) book. This is a way that cord was turned into an "eye." In that book, there was a "recipe" for making a patterned belt using loads of half hitches (Friendship Bracelet Knots). The other techniques (like using a pull string) are commonly used in many kinds of cord and rope work.
The "belt and buckle" was referred to as:
Barnacle Knot Buckle
Loop and Larks Head Buckle (Note that from a certain point of view, a Larkshead knot is just a FB or BF knot.)
Cat's Tail Buckle Belt (The tail going through the buckle, reaching round the neck and going back down the hole is like a cat's tail winding round.)
Cat's Paw Buckle
Sailor's Diet Buckle (Sailors often lost weight while at sea, so they had to keep adjusting their belt. They wore rope belts and saved their leather ones for when they were in port.)
Videos
By Masha Knots
By Masha Knots
By Kleine Vos
Editors
The original author of this tutorial is Alicat but it was also edited by Foz, ririttt, gmbong00, craftygirl98, Kestrel, kleinevos, Gladtobemom, Californiadave, Allison98 and Masha_Knots.
Uploaded photos (see all 8)
Comments