(( Embellishments )) Decorating Bracelets with Beads or Charms
Why Decorate?
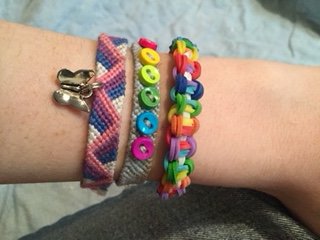
It is fun to decorate your bracelets with beads and charms and it adds more personality to them. Sometimes it is nice to add beads to a bracelet to make it different. If you are giving a bracelet to a friend who already has a lot of other bracelets, having one with beads or charms will make it much more special.
You can add charms to bracelets to make your own charm bracelet. You can buy the charms or make them yourself out of materials like shrink plastic or polymer clay. You can even use pieces of broken jewelry that you think look pretty. Adding charms to a bracelet is a good idea if you want your bracelet to be really personal.

Beads
Types of Beads
You can use lots of kinds of beads to add to your bracelet's personality. There are many kinds of beads that you can use. Listed below are a few different kinds of beads that work very well for bracelets.
Seed Beads
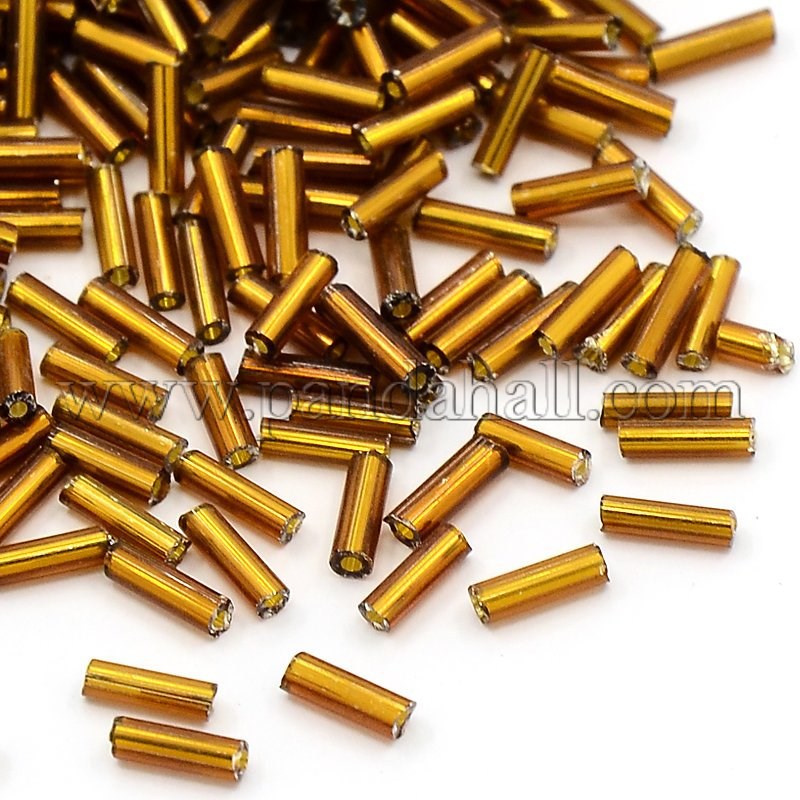
Seed beads are very small glass beads. They are usually round but can come in different shapes and many colors. They can range in price depending on the quality but are overall very inexpensive. Because seed beads are very small, they can really only be used on bracelets made with thin thread, such as embroidery thread, and can usually only be passed through one or two strings.
Pony Beads

Pony beads are small plastic or glass beads that are larger than seed beads. Pony beads come in a variety of colors and are usually round. However, you can get them in different shapes, like hearts and stars, and you can also get them in colors like glow-in-the-dark, or sparkly colors. "Baby" pony beads, which are small pony beads that are only a little larger than seed beads, are the best to use for most bracelets and can be passed through multiple threads easily. Large pony beads are good for bracelets made from thick thread such as yarn. Pony beads can be bought in variety packs and are not very expensive.
Perler Beads

Perler beads are a different kind of bead that are used for different purposes. Perler beads are soft plastic beads shaped like rods that are normally melted together to make a picture. However, perler beads can be used for bracelets as they are a little larger than seed beads and very colorful. They give a playful feel to your bracelets. Perler beads come in many different colors and in variety packs and are relatively inexpensive.
Crystal Beads

Crystal beads are beautiful beads made from crystal glass. Crystal beads are cut in different ways and reflect light in multiple colors. These beads come in many different colors but are not available in bright colors such as neon colors, and make bracelets look very sophisticated. They are somewhat small so only a few threads can be passed through one. Crystal beads are very expensive, so they are best when used in bracelets that are very special.
How to Add Beads
Beads are easy to add to bracelets. Below are a few different ways of how to add them to your bracelet, but you can make up your own ways as well.
Adding Within Knots

You can add a bead in the middle of the bracelet with relative ease. Most bracelets look best if the bead is in the middle. If you choose this method, it is important to know that the knots around the bead must be tied very tightly.
We will use bracelet pattern #2 as an example of how to add beads.
1. Complete the pattern three times. Following the pattern, you should have five complete arrows, three yellow and two red, and two incomplete red arrows at the beginning and end.
2. Take the two middle strands of thread, which should be yellow, and thread the bead onto both of them. Tuck the bead up against the bracelet as tightly as possible.
3. Complete the pattern three more times before adding another bead. Initially, the threads will be hard to knot around the bead. Don't worry, just tie them as tightly as possible. You may notice that the pattern is getting a little sloppy looking around the bead. Again, don't worry, just keep tying the knots as usual.
4. Continue adding beads in this way until you reach the end of your bracelet and you're done!
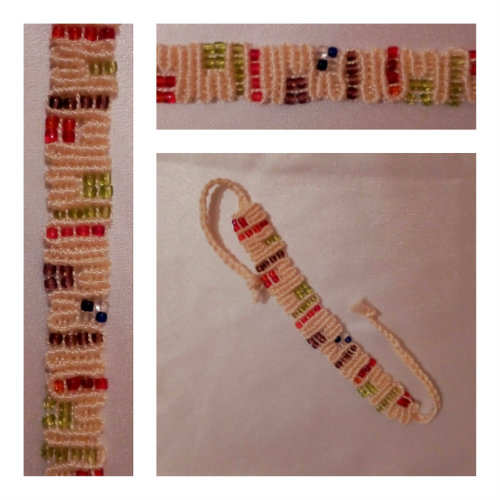
Adding at the Edges
Instead of adding a bead in the middle of the bracelet, you can add a bead so that it is along the border of the bracelet. This looks nice on many different bracelets.
We will use bracelet pattern #2 as an example of how to add beads.
1. Complete the pattern three times. Following the pattern, you should have five complete arrows, three yellow and two red, and two incomplete red arrows at the beginning and end.
2. Before you tie your next knot, add a bead to the yellow thread on the left side of the bracelet, and then tie the knot with the bead on it. The bead will stick out to the side of the bracelet. Do the same thing with the yellow thread on the right side of the bracelet. Both of the beads will be "hanging" off of the sides of the bracelet.
3. Complete the pattern three more times before adding another bead. Initially, the threads will be hard to knot around the bead. Don't worry, just tie them as tightly as possible. You may notice that the pattern is getting a little sloppy looking around the bead. Again, don't worry, just keep tying the knots as usual.
4. Continue adding beads in this way until you reach the end of your bracelet and you're done!
How to add the button at the end
this is actually really easy to do.
1.when you start your bracelet make a loop.
2.complete the entire bracelet(dont tie off the ends)
3. seperate the strings into two bunches
4.find a button that is big enough and all the strings can fit through
5. take one bunch and stick all the strings trough one hole in the button from the bottem then put it back through the hole diagonal it.
6. do the same with the other bunch of strings but put it through the 2 remaining holes.
7. tie the bunches together in a knot under the button. cut off extra strings and you are done.
It would be awesome if you were really creative and posted pictures of your design/ideas!
Editors
The original author of this tutorial is Drea but it was also edited by Stefan, Rachel33, lorie, Kestrel, k_marie and braceletsgirl6.
Uploaded photos (see all 61)
Comments