(( How to... )) Design Bracelet Patterns
Designing a normal pattern
The method used can be simplified into these steps:
1. Draw the pattern on a square-grid paper (download grid papers here).
2. Split up the pattern in small equivalent pieces, as small as possible.
3. Take one of the pieces and use this to color the knots in a "pattern-map".
4. "Solve" this pattern-map by coloring the threads between the knots.
5. Determine what type of knots your map contain.
6. When you are ready, you can input your pattern in the Generator.
Step 1: Draw the pattern

Take a square-gridded paper and put it so the squares are diagonal. Draw outer lines for your bracelet on the left and the right side of the place where you are going to draw it. This will determine the width of your bracelet. Now color the space within the outer lines until you got a cool pattern.
Step 2: Split it up (determine periodicity)
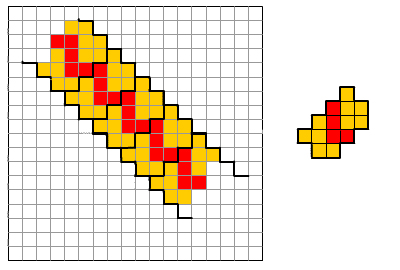
Look at the pattern and see how it repeats. Split it up in equal parts that are as small as possible.
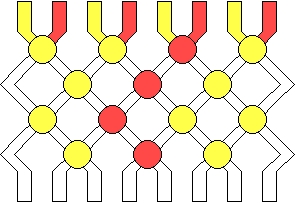
Step 3: Color the knots in a "pattern-map"
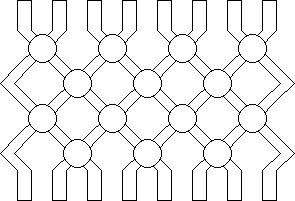

Draw a "pattern-map", with the same size as one of your pieces in the previous step. Color the knots in this map in the same way.
Step 4: "Solve" the pattern-map
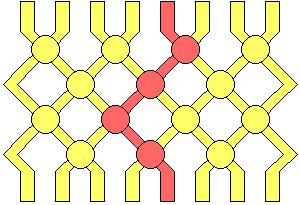
This is the trickiest part. The thing is to colour the "threads" between the knots in the map so:
- the "threads" between the knots are continous, that is, if one of the threads above a knot has a color, then one of the threads below must have the same color.
- above and below every knot, one of the threads has the same color as the knot.
- the thread at the top has the same color as the corresponding thread at the bottom.
The last condition is only necessary when designing repeated patterns.
Beware - this step can not be done for all patterns. If you cannot find a solution for your pattern, then you have to remake your pattern or maybe use another color for some of your knots.
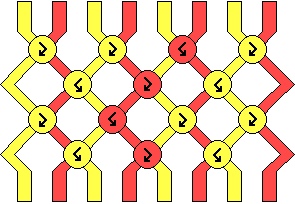
Step 5: Determine knots
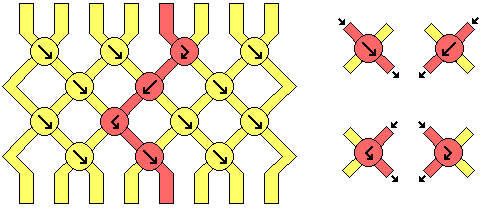
Now determine what knots that should be used. You can use the four basic knots of friendship bracelets. Mark the knots with arrows as I have done in my other patterns to indicate which knot is used. The simplest way of doing this is by looking at the thread with the same color as the knot and look what way it goes.
When you are ready with all the steps, you can input your pattern in the Generator and get a similar instruction as the ones on this homepage.
Designing a 1212 pattern
Designing a 1212 pattern is easier than designing an arbitrary normal pattern. This pattern type only concerns two-colored patterns and they may only consist of fbk's or bfk's (forward-backward knots or backward-forward knots).
1. Start by doing step 1 to 3 in the previous tutorial. Make sure you design a pattern with only 2 colors.
2. When solving the pattern-map, the starting color string should be ordered with every second string of color 1, and every second of color 2, like 12121212 (this is where the pattern name comes from). Solve the pattern using only fbk's and bfk's, like shown below.

and then place out the proper knots:
The 1212 version of the zig-zag pattern is done! You can start tying right away!
Helpful things
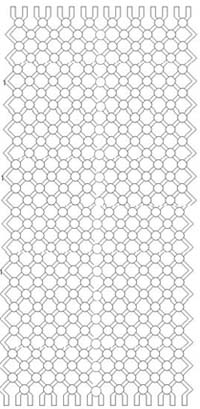
Pattern map
This is a 16 knot 32 row pattern map. To use it, right click on the picture, click 'copy' and then paste it into a Word document, You can then resize it and print it out.
Grid papers
You can download grid papers in PDF format from the tutorial Grid papers
Editors
The original author of this tutorial is Stefan but it was also edited by Frosty, Kestrel, k_marie, pomeranian, nico351manu, Foz, Chrispy_Waffels, berytan and kleinevos.
Uploaded photos (see all 13)

Comments