(( Projects )) How to start a cell phone cover
This tutorial will explain how to start a cell phone cover without any loose threads at the beginning.
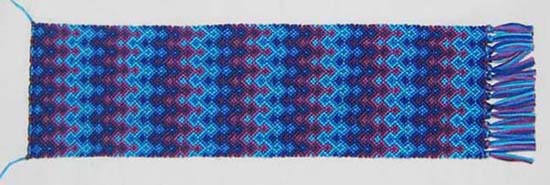
First, choose a pattern that has the right size - to make things easier, pick a pattern where you can add as many repetitions as needed. I chose #7176, which consists of a 10-thread pattern repeated three times.
My phone cover needs to be 7 cm wide, so I'm using 7 repetions of the original base pattern, i.e. 70 threads in total.
The base pattern has 5 colours and 10 threads - 2 threads of each colour.
However, to make this work you'll want to cut only one thread of each colour, twice the length needed. So there are 5 threads per repetition, and each thread will be 240 cm long.
I like working on the upholstery of my swivel chair (a firm pillow would do just as well), and the first thing to do is to pin down one thread (approx. 50 cm) in a horizontal line. This is what all the threads will be fastened to.
Starting with the outermost colour in the pattern, make a lark's head knot over the horizontal thread. Don't pull it tight just yet, but rather leave it open about 2 cm.
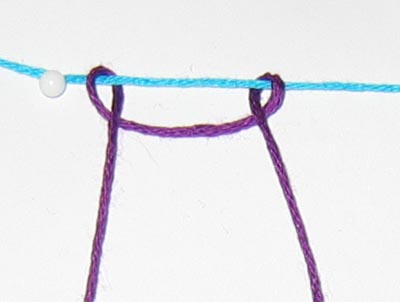
Take the second colour and make a lark's head knot inside the first colour.
Repeat this with all five colours, until they're all inside one another.
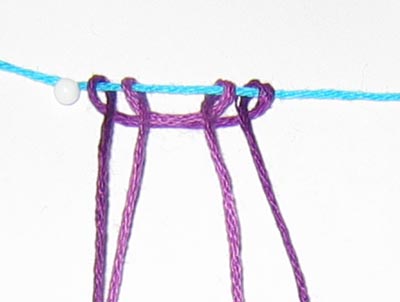
Gently pull the knots tight, beginning with the centre colour, and repeat this process with the 5 colours of the second repetition.
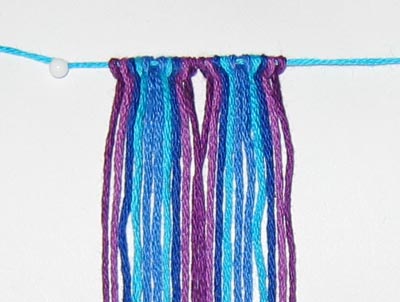
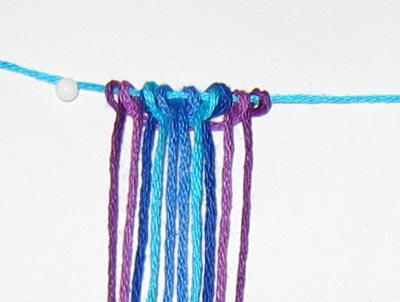
Add the next 5 repetitions until all your threads have been secured to that one horizontal thread. By doing this you've not only avoided loose threads, but all of the threads are in the exact correct position to start knotting.

Make the baggie as long as you need it, depending on the size of your phone. The phone in this example is 9 cm long, so make it about three times 9 cm, or 27 cm (10.6 in). I've made overhand knots with groups of five threads to finish it off.
Since I'm making it for a phone that is on a different continent, I made a stand-in out of paper to make sure the cover will fit properly. Fold up one side to create the baggie, but make sure to leave enough for the flap, so it will be able to stay shut. Then use the threads we used to larks-head knot the threads onto in the beginning to sew up the sides. Done!

Editors
The original author of this tutorial is Foz but it was also edited by ScruffyPup, k_marie, Raffipops, jokysun and kleinevos.
Uploaded photos (see all 37)
Comments