(( Projects )) How to make bracelet straps for a watch
| Table of contents |
|---|
| 1 - ellionaki's version 2 - tundemazs's version |
First of all, you should choose a pattern of a bracelet which is as wide as the opening of your watch.
By opening, I mean the part of the watch where the strap is.
ellionaki's version
You are going to need two straps and each one should be about 9 cm long, but the length can change depending on your hand . After you've done the two straps, you should sew them on a thick cloth so that they will be more steady. You should also sew each end, because some strings will be dislocated and the whole bracelet will eventually fall off if you don't do so. Be careful though to sew both the cloth and the ends in a way that the pattern will not be "ruined". The best way to achieve that is to choose a very thin but steady thread, at the color of your bracelet and, as to the cloth, try to sew it as close to the side of the bracelet as possible.
When you're done with that, fold the one side of each strap at about 1 or 2 cm to create something like a hole so that the "needle" of the watch can pass through it. By "needle" I mean this thing holding the straps of the watch in place. It's better to use a sewing machine to make it more steady, but you can also sew it yourself. In most watches this "needle" can be removed and set back to place, so that shouldn't worry you much. However, what you should really pay attention at, is to sew the end of the strap in a way that the "hole" is big enough for the "needle" to pass through it, but not too big so that it looks ugly. Sometimes it can be pretty hard to put the "needle" inside the watch, but if the bracelet isn't too thick you'll be done with that in a few minutes. If it is thick, though, you can always pull down the cloth that you've sewed before and make a "hole" only with the bracelet and not with both the cloth and the bracelet.
Then you can use the clasp of your old watch and sew it at the end of one strap, or you can also tie it like any other adjustable bracelet.
I hope you found this tutorial helpful and excuse me for not having any photos to help you more. If you have any problems please feel free to contact me for further information. :)
P.s. Please excuse any grammar or spelling mistakes!
tundemazs's version
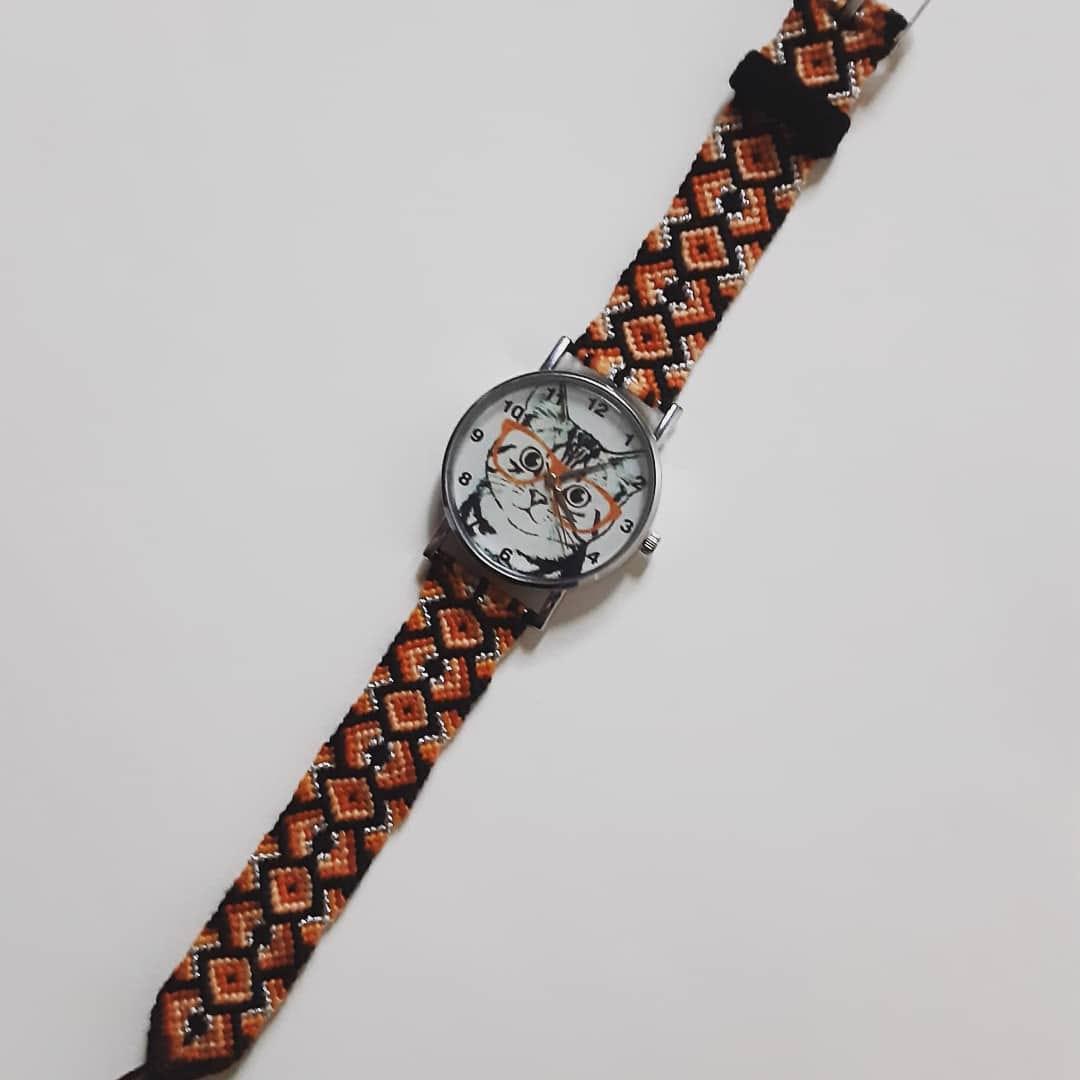
There's an other way to make straps for a watch using friendship bracelet patterns, in my opininon it's simpler but not as long-lasting as the above - I don't use a cloth for steadying the bracelet, it's just the knotting that holds the straps in place.
(The pattern I used is a 20-string version of #1343 {https://www.friendship-bracelets.net/pattern.php?id=1343}, and the watch is made for my sister who loves music but doesn't really like colours, so a piano pattern is the perfect choice for her.)
As I said before, it's just the knots that make the straps, so at the beginning we need to attach the strings to the watch, basically with the technique of the tutorial on how to start with a safety pin {https://www.friendship-bracelets.net/tutorial.php?id=1876}, only without lark's head knots.

I always work with double strings, so in the tutorial I'll show you how to attach double strings.
Fold all the string in half (that means you need to cut your strings double the desired length), and in pairs slip them in the gap between the lug (the axe which connects the strap to the watch, ellionaki described it as the "needle") and the watch. Keep them equal at the two sides, and begin knotting the first row one by one.
Of course you can slip in all the strings at once and knot the first row together, but I found that rather difficult and confusing, so I recommend to develop the first row by separate knots. I also made the knots of the second row as soon it was possible, because it holds together the separated pairs of string.
After that all the strings are attached and the two first rows are done, continue the pattern to the desired length (either in sections or row by row). I recommand to do first the strap that begins at the top of the watch ('at noon', where the number 12 is), because at its end there's the buckle which is a bit more difficult to attach than simply ending the other strap.
Finish the strap with a straight row (in which all the strings are knotted), and get half of the strings under the axe of the buckle and the other half above. For example the strings you knotted with can go under, and the strings you knotted on above.
Make two knots with each pair of strings so the axe of the buckle is secured between the knots.
Then cut the strings short at the knots, and apply some glue to secure them. You can use nail polish too, but in my opinion glue is safer and also cheaper. Don't worry if it looks a bit messy, it won't be seen when the watch is on your hand, the other strap would hide it.
While waiting for the glue to dry, make the "keeper" loop, this will go on the strap with the buckle. You can use a wide variety of materials, such as rubber bands, ribbons etc. I made an entirely black four-string candystripe about twice the width of the strap long, and knotted-glued it around the strap - the messy end there also hiding under the strap.
Now we've finished the hardest part of the watch:) the other strap is way much easier.
For the other strap, start in the same way as the first one, and continue knotting until you reach the desired length, and end it in a V-shape, like a simple chevron. Finish the strap with the shaped technique {https://www.friendship-bracelets.net/tutorial.php?id=2852}, and at the end knot one forward knot around all the strings, cut them short and apply some glue again to secure it.
And then your new watch is finished!
I hope that my instructions help you to make something new and beautiful, although I'm not a native English speaker, so excuse me any mistakes.
If you have any questions, feel free to comment or PM me, I'm glad to help:)
tundemazs
Editors
The original author of this tutorial is ellionaki but it was also edited by GotCookt, tundemazs and k_marie.


Comments