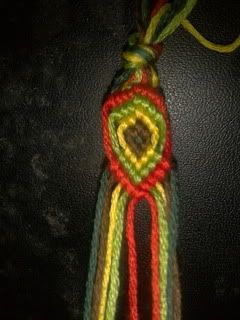
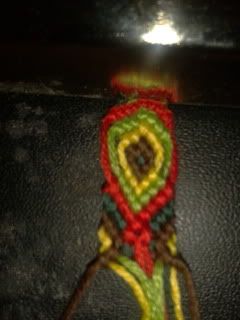
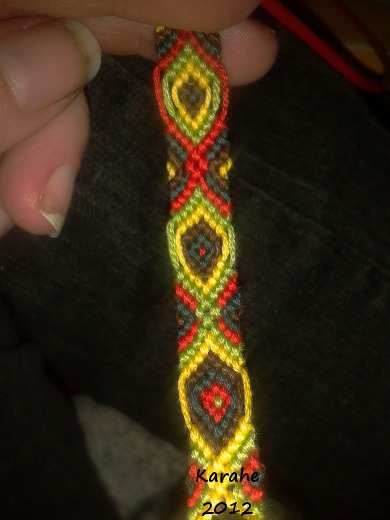
(( Bracelets )) Ten Strand Fish Design
Materials and Set Up
For this pattern, you need 10 lengths of floss in five colours.
In the tutorial I'll be using yellow, red, brown, light green and dark green. Start your bracelet however you wish, with a buckle, or a loop, or a braid.
Set Up: 1 2 3 4 5 5 4 3 2 1
Step by Step
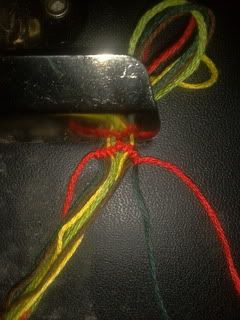
Step 1
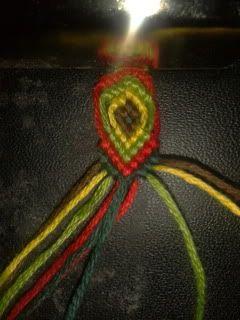
[p]Knot the red threads in the centre, and then knot outwards to make a backwards red chevron.
Step 2
Next, knot the light greens in the middle and, similar to the red strings, knot them out as a backwards chevron. However, this time when you knot them over the dark green strings, stop. Don't knot them over the red strings.
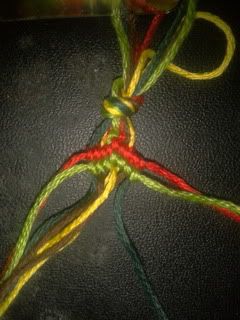
Step 3
Next up are the yellow strings. Again, knot them in the middle and then outwards over the brown and dark green strings. This time, you don't want to be knotting them over the light green OR the red strings.
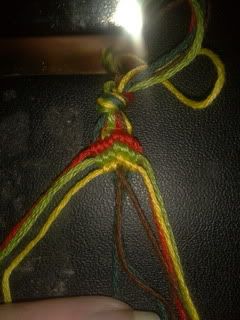
Step 4
Then knot the brown strings in the middle and over the dark green strings on either side. Don't knot over yellow, light green or red. Finally, knot the dark green strings in the middle.
Step 5
Now at this point, it gets slightly complicated. We're going bring the strings back into their original order, from the order they're in now. So take the brown strings, knot them over the green strings, and then knot them together in the centre.

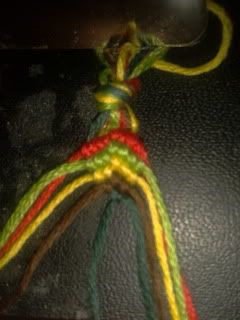
Step 6
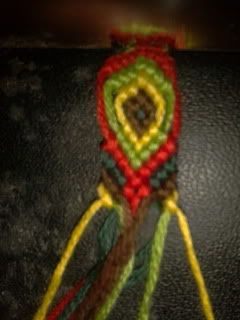
Then take your yellow strings, knot them over the dark green strings, then the brown strings, and finally together in the middle. At this point you'll notice the yellow strings are pulled straight before knotting - this is fine. Do the same with your light green threads, pull the strings so they're fairly straight then knot them over dark green, then brown, then yellow, then together in the middle. Finally, do the same with the red threads - pulling the threads fairly straight, knot them over dark green, brown, yellow, light green, then together in the middle. At this point, your threads should be in the same order you started in. We now have the body of the fish done, and it's time to work on the tail :)
Step 7
Take the dark green threads, and knot them inwards. Don't knot them over the red threads.
Step 8
Knot the red threads over the dark greens with forward/backward and backward/forward knots. At the same time, knot the brown threads backwards on either side over both the yellow and light green threads, and knot the yellow threads over the green threads using forward/backward and backward/forward knots.
Step 9
Knot the brown threads back over the light green and yellow threads so they are on the outside again.
Step 10
Knot the dark green threads over light green, yellow and brown til they're on the outside.

Step 11
Finally, knot the red threads together in the middle, and then knot them out to the edges to complete the tail of the fish.

At this point, your threads should be in the order 5 1 2 3 4 4 3 2 1 5. From here, to repeat the pattern, you can start again from Step 2.
Note: in order to make it far more fish-like, instead of finishing Step 11 and going straight back to step 2, you can add in a number of backwards chevrons until you reach the backwards red chevron again. I tend not to add the extra chevrons purely out of laziness.
Editors
The original author of this tutorial is Kestrel but it was also edited by Foz and Alicat.
Uploaded photos (see all 1)
Comments