(( Bracelets )) Butterfly Bracelet
| Table of contents |
|---|
| 1 - Step 1 - Make Clip 2 - Step 2 - Arrange Colors 3 - Step 3 - Soul String 4 - Step 4 - Horizontal Lines 5 - Step 5 - Going Crazy |
This kind of bracelet is made with a Double Half Hitch knot, this is like making the Normal Pattern knot in reverse, soon you will see what i'm talking about ... is very simple to make and you can create countless shapes and designs with this.
Step 1 - Make Clip
Make Clip
We will make the clip before starting the bracelet.
For this we must cut 5 threads of a size of approximately 1.20 mts. (I'm using ocher, pink, orange, yellow and sky blue)
After that we bend the strings into half to find the middle part and when we find it we will make a knot.
Then we begin to make a braid of 2 or 3 cm and we close it both sides.
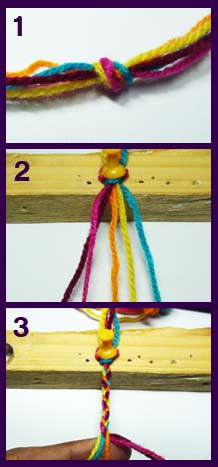
*****NOTE: REMEMBER to arrange the colors of the bracelet before starting the braid.
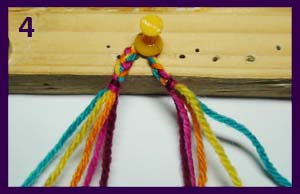
Step 2 - Arrange Colors
Arrange Colors
When we have the clip ready, arrange the colors of the bracelet again, your colors must be arranged symmetrically. (as in the picture)
And now that we are ready we will start the Double Half Hitch knot.
Step 3 - Soul String
The Soul String
First i'm going to talk a little bit about the soul string... the soul-string sets the direction in which the others strings will be rolled up to form shapes, and this is exactly with what we'll play...because there are many different shapes that you can create, FOR EXAMPLE, i want to start my bracelet with two horizontal lines.
So just take the outer string and make it your soul string. In my case is the sky-blue string.
The soul string goes above the other strings at all the time (as in the picture)
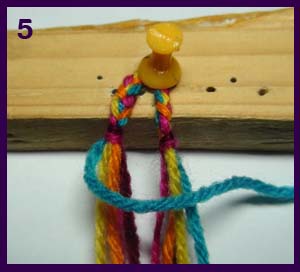
*****NOTE: REMEMBER to give direction with your soul string while we are rolling up the other ones.
Step 4 - Horizontal Lines
Double Half Hitch knot
To make the knot we place the soul string over the other strings. (like the picture above on step 5)
Then we roll up the first string (yellow) on the soul string (sky blue) (as it shows in step 6-7)
After that with the same yellow string we repeat thes 6-7 step one more time. (Yes! to make the Double Half Hitch knot you need to make the 6-7 step twice!)
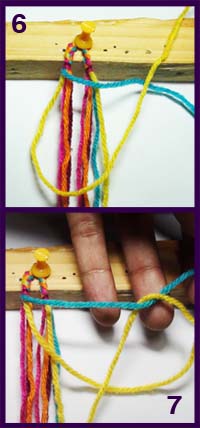
Repeat the process with the other colors until you reach the last one (im my case the other sky blue string).
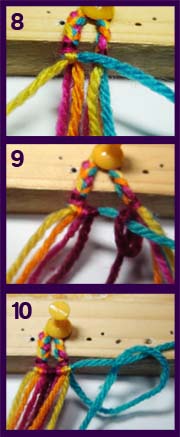
*****REMEMBER to give direction with the soul string and keep it stretched otherwise the shape will look deformed
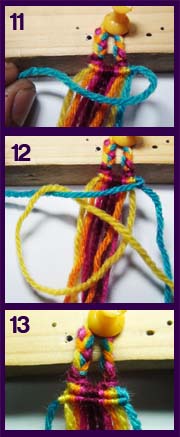
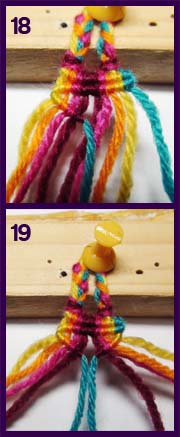
Once we've finished making the Double Half Hitch knot with all the strings we will grab the soul string and well try to get it back to the other extreme to make the second horizontal line (as it shows in the step 11, 12 and 13)
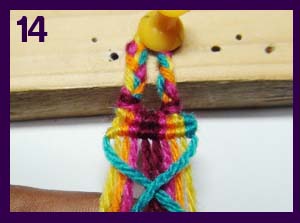
Step 5 - Going Crazy
Going Crazy
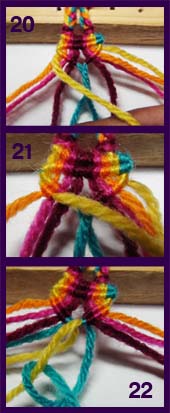
Ok... now that we have the 2 horizontal lines we are ready to start the pattern, we will use two soul strings, in my case the two sky-blue strings, and with them we will make diagonal lines insted of horizontal lines. how?!
NOW we need to give with the soul strings a diagonal direction AND REMEMBER you need to make the step 15 - 16 two times to obtain step 17, why? Because it takes two rolls to make one Double half hitch knot
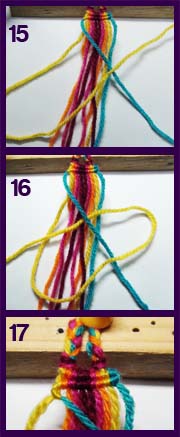
We will roll up the 4 strings (the yellow, the orange, the pink and the ocher one) over the soul string (sky-blue). Once we get to the middle we'll repeat the same process on the opposite side.

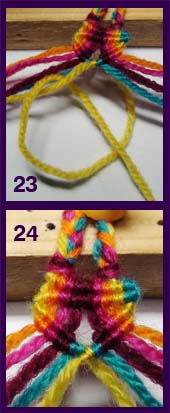
NOTE that the sky blue strings are in the middle and they dont roll up on each other
Now we will make a second diagonal line, but this time the string setting the direction is the yellow one (that means that the two yellow strings are now my two soul strings.
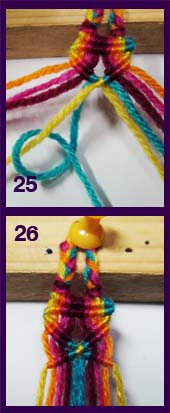
We will roll up the orange, pink, ocher and sky blue over the yellow soul strings as we did before with the sky-blue one. we will do this on both sides.
After we have done that we will have the yellow strings in the middle, and this time we will roll over one onto the other to make one Double Half Hitch knot with them. (as it shows on the 23 - 24)
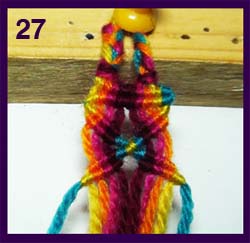
Going Crazy 2
To continue the pattern we will grab the two yellow strings in the middle and start making two more diagonal lines, this time going to the outside.
After we've finish with those diagonal lines (as in step 26), we will switch again to the sky-blue ones (in the middle), to make other two diagonal lines going to the outside as well.
We will do this process on both sides, and this will be the result.
You have to repeat ALL these steps over again, starting from the 2 horizontal lines (at the beginning of the tutorial), and then you'll get something like this.
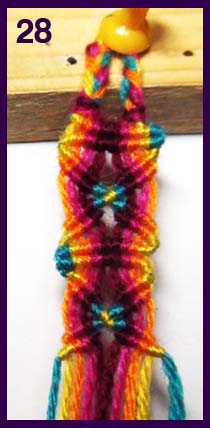
You can also play, not only with different colors, but with different amount of strings, horizontal or diagonal lines.
Once you've finish you can make two braids to close the bracelet.

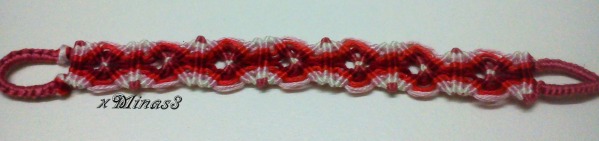
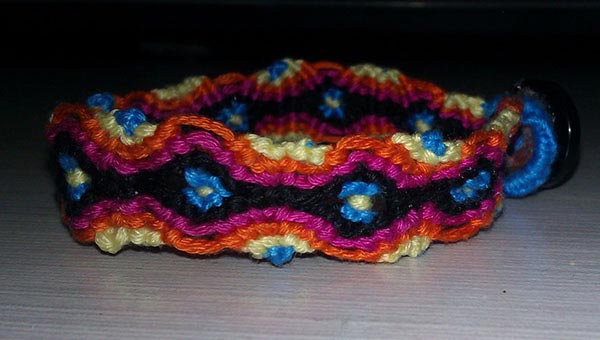
FINAL RESULT CAN BE SEEN HERE - BUTTERFLY BRACELET PHOTO
Thanks to princes_5775 we know that this knot it's called Double Half Hitch, i'll be uploading more tutorials using this type of knot, so if you liked it remember the name :D thanks for all the nice comments btw. peace and love
NOTE: *removed by moderator - do not add again*
Editors
The original author of this tutorial is Chystie but it was also edited by k_marie, princess_5775 and Ukiedancer.
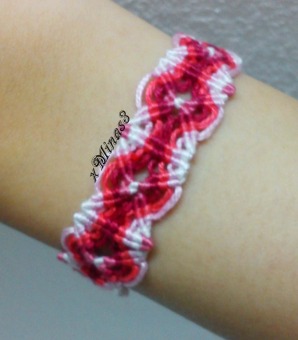
Uploaded photos (see all 21)
Comments