(( Bracelets )) Wrapped Chinese Staircase
| Table of contents |
|---|
| 1 - Materials 2 - Step by Step 2.0 - Step 1 2.1 - Step 2 2.2 - Step 3 2.3 - Step 4 2.4 - Step 5 2.5 - Step 6 2.6 - Step 7 2.7 - Step 8 |
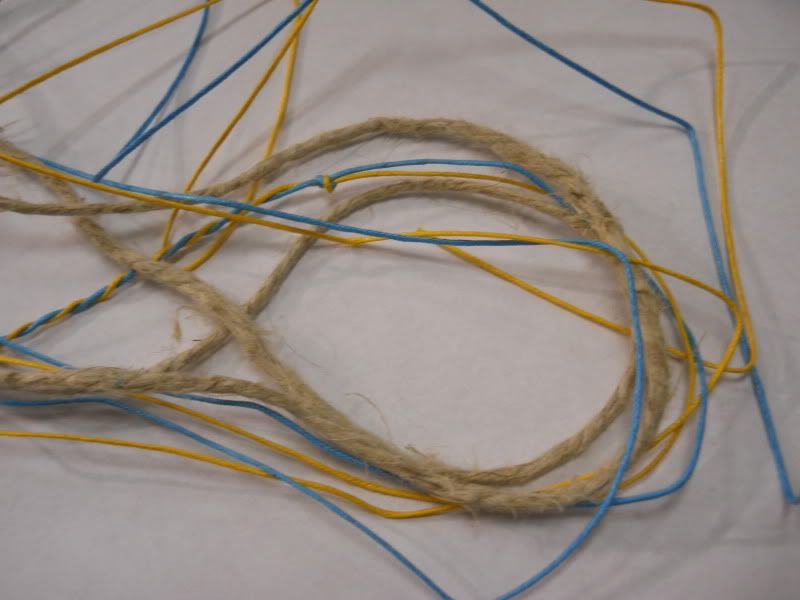
Materials
1 thick piece of hemp, or a round cord, about 7inches long.
2 strands of either thin hemp, or embroidery floss. (I recommend colored hemp, or braiding cord and is what I will be using in my examples) about 48 inches long.
Step by Step
Step 1
With your two colored strings, tie an overhand knot close to the end and secure it to your clipboard or other work station. Twist the two pieces together until you reach about 3 inches and then tie another overhand knot.
If you have a different or a favorite way of starting your bracelets, then begin that way.
Step 2
Secure you colored strings and your center cord (the thick hemp in my case) to your clip board. DO NOT TIE THEM TOGETHER.
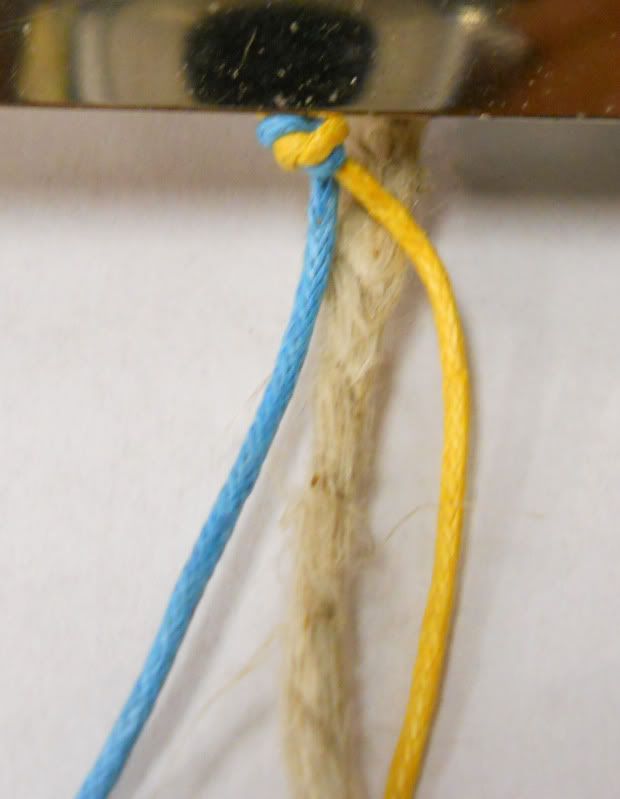
Leave about 1/4 inch of hemp, that will be trimmed later, this will make sure your center cord doesn't slip out.
Now slide your strings into place like this:
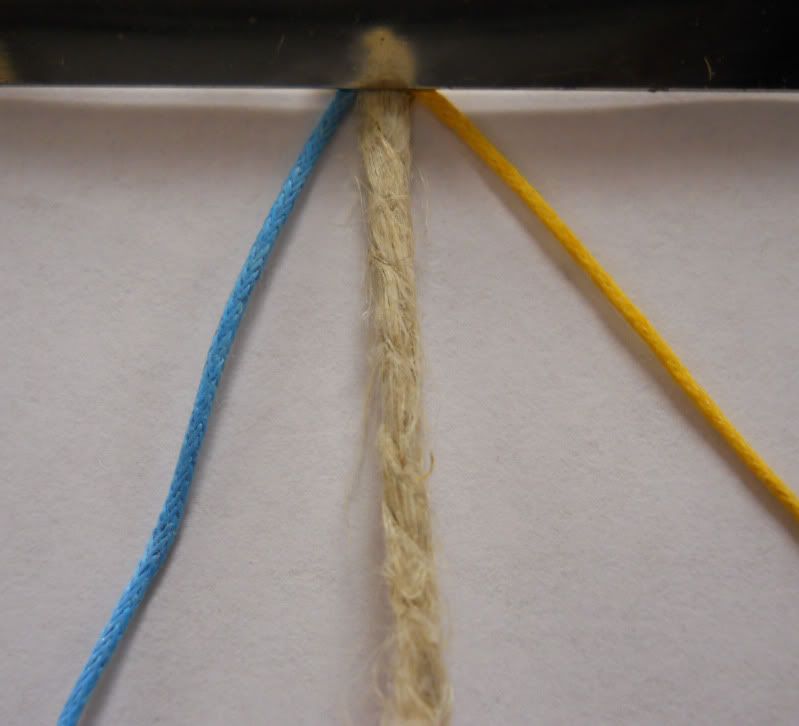
Step 3
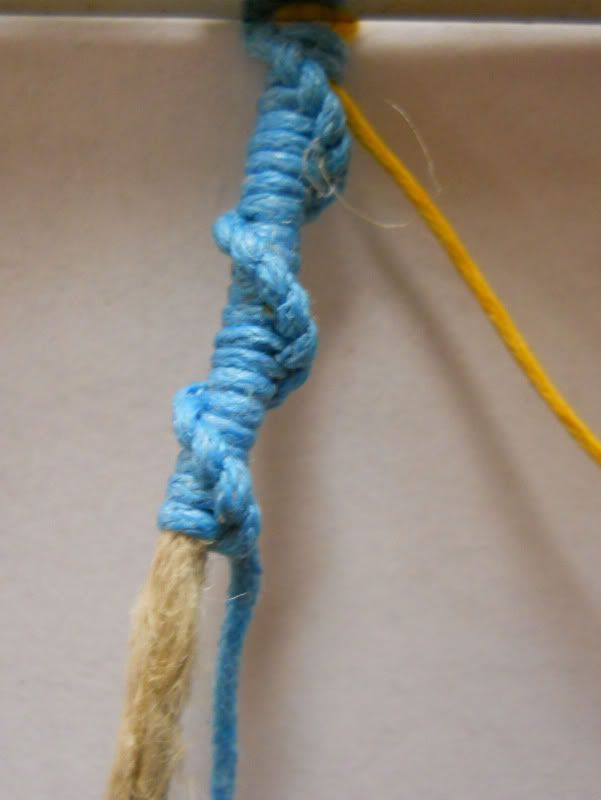
Begin the same as a classic CS. Chose your first color and make [i]2[/i] Forward Knots over the center cord AND the second color.
Step 4
Put your secondary color to the side and continue to tie your CS with your first color for about 1 inch.
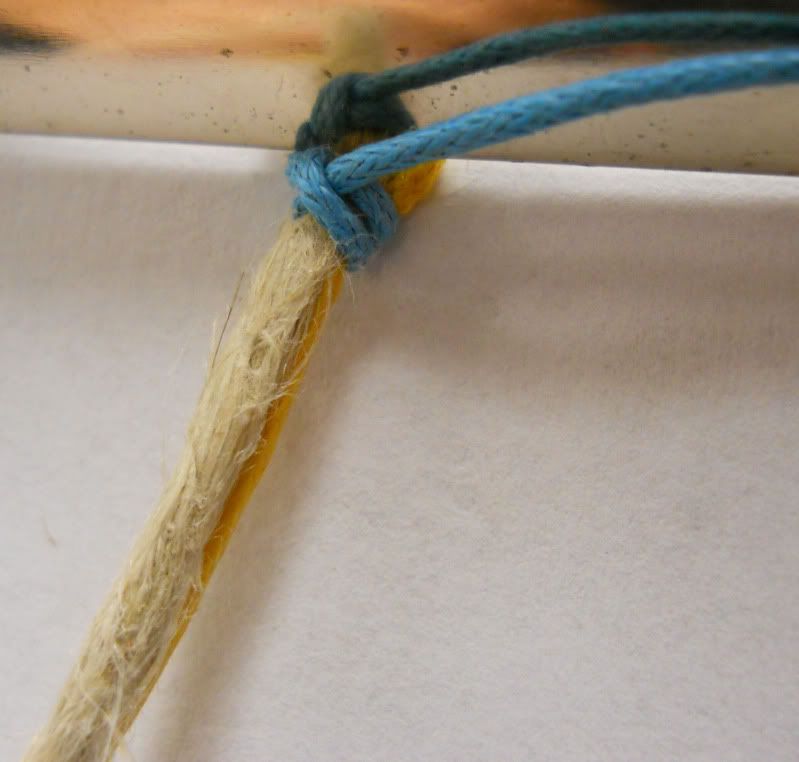
Step 5
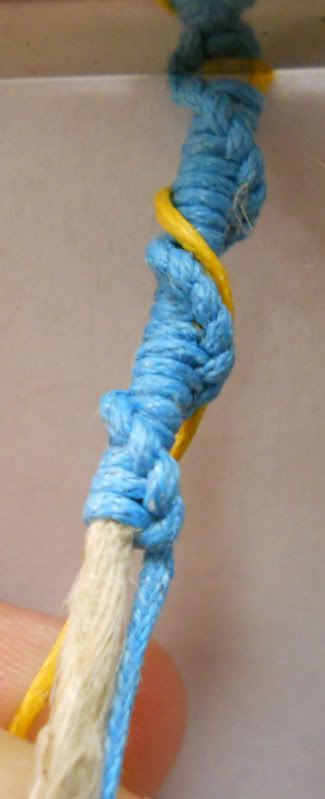
Two knots before ending your section, take your lose second string and wrap it around the CS, for mine I went above the 'stair' part.
Step 6
After wrapping your lose string tie your last two knots, with the first color, around all the string just as you did in the beginning.
Step 7
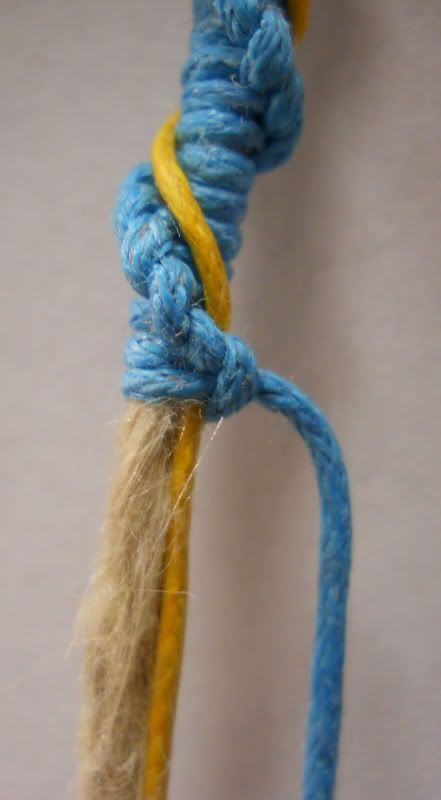
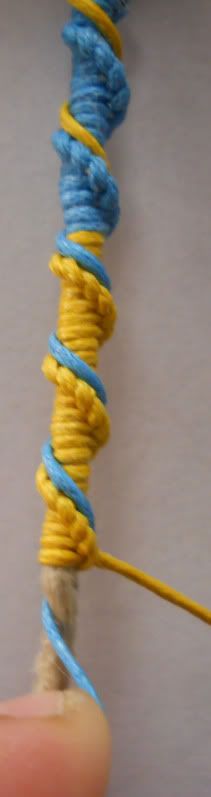
This might sound complicated but it's very simple. The string you were just using for your CS (in my case the blue) leave it out, do not tie anything around it, simply start the next section (in my case with yellow) and leave the first color out, make about 1 inch of CS with your second color and repeat steps 5 and 6. Keep going until your CS is about 5 or 6 inches(depending on your wrist size or the pattern you want with your colors).
Step 8
When you are done, and you have tied your last Forward Knot around both the center cord and the last string, simply tie and overhand knot around the two knotting strings, excluding the center cord.
Now twist the two colors colors for 3 inches and tie another overhand knot ending your bracelet. (Or finish it how ever your favorite way is.)
Trim the center cord close to the CS.
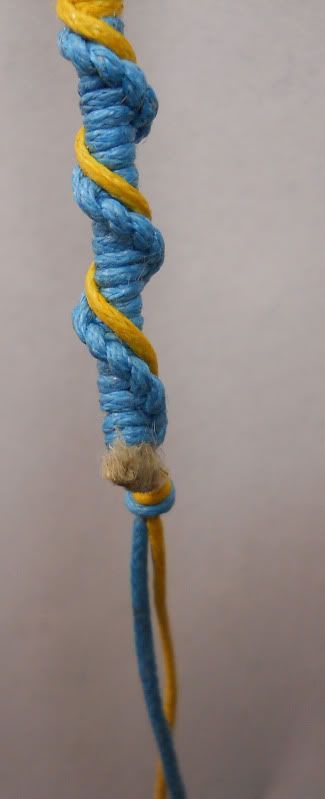
Note: If you don't like the center cord showing, you can slide on some wooden beads with large holes, glue it at the very ends to keep it from sliding off. And your bracelet is finished! (I didn't do it on this bracelet because I didn't have beads that matched.)
Here is a picture of the completed Bracelet!
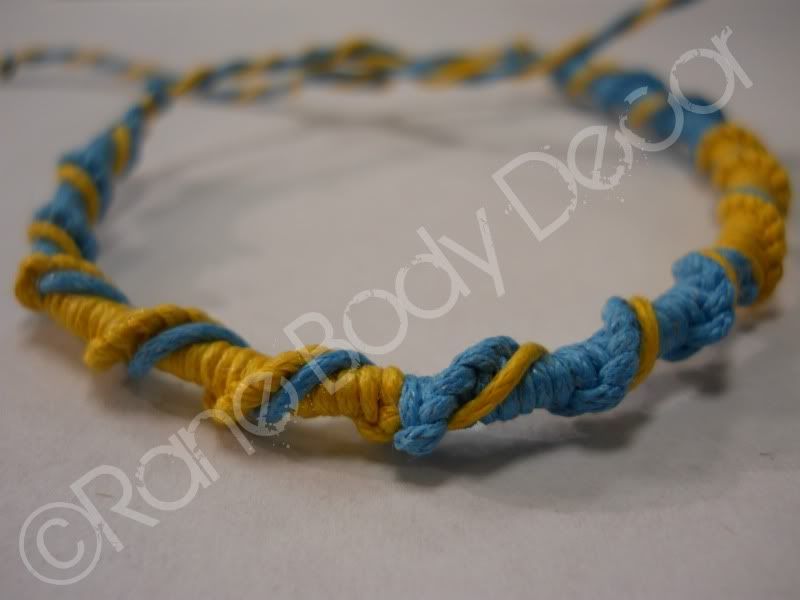
This bracelet takes me about 20 minutes to make, not including the time to pick my colors and measure/cut my strings.
Editors
The original author of this tutorial is AutumnRane but it was also edited by .
Uploaded photos (see all 1)
Comments