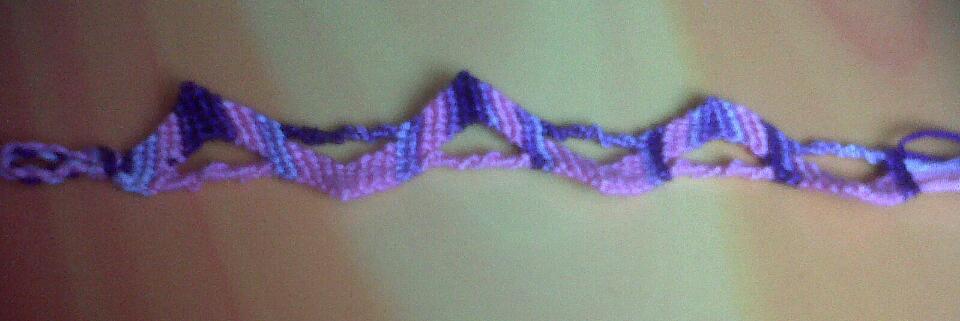
(( Bracelets )) Shaped Zig Zag with Chinese Staircases
Materials and Set Up
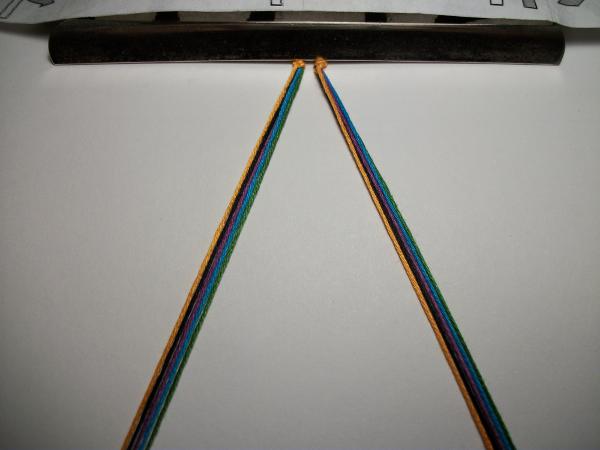
For this tutorial, I've chosen to use ten threads, but you don't have to do the same number - you can use more or fewer (though I wouldn't use much less than 10). I'm using 5 colors, cut at 90 inches, folded in half so they're 45 inches (I have a 7 inch wrist, adjust accordingly), and I've started with a buckle.
My colors are Purple, Turquoise, Orange, Black, and Green.
Set Up: OBPTGOBPTG.
I've chosen to start the bracelet going to the right and to use three strands for the Chinese Staircase section of the bracelet, but you can modify these to suit your preferences once you are comfortable with the process.
Step by Step
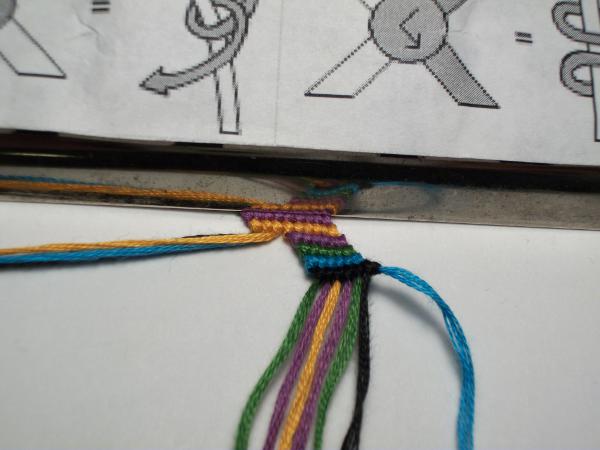
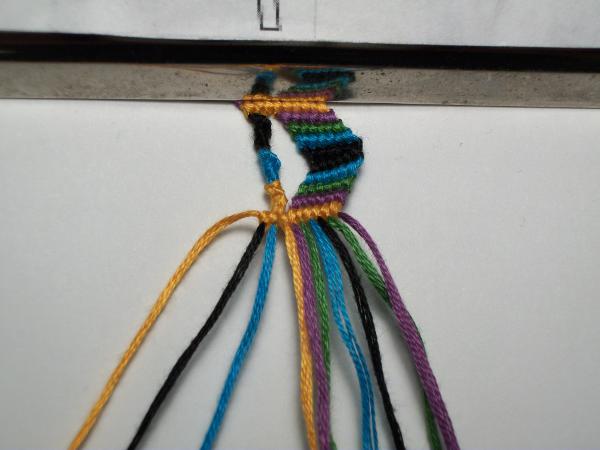
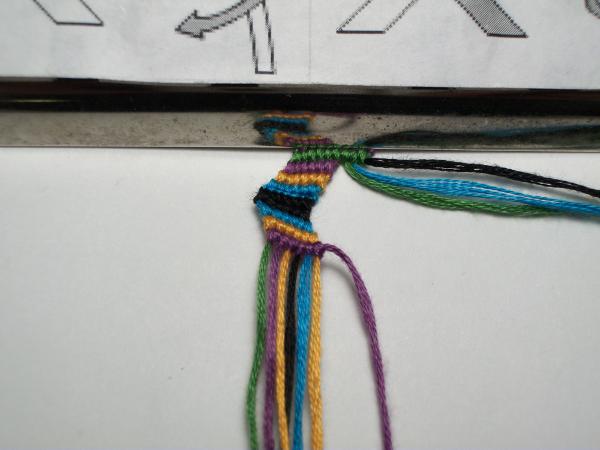
Step 1
Start the bracelet as you would a standard diagonal striped pattern, going toward the right. After the first full-width stripe (orange in the example), take the three strings on the left aside and ignore them for now.
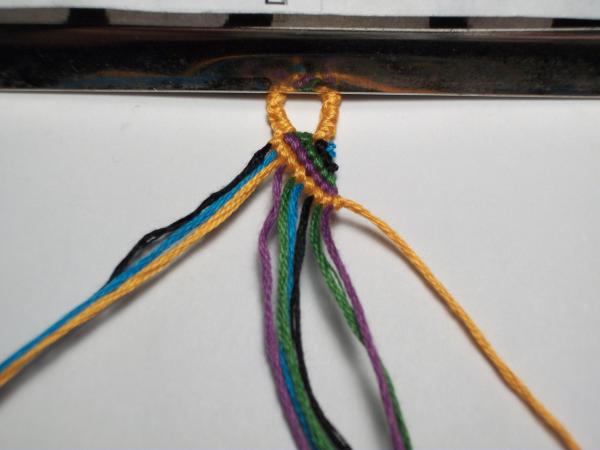
Step 2
Begin the next stripe with the fourth string (purple);
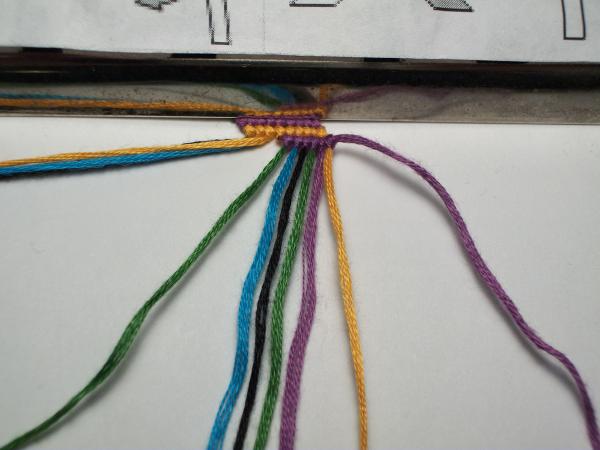
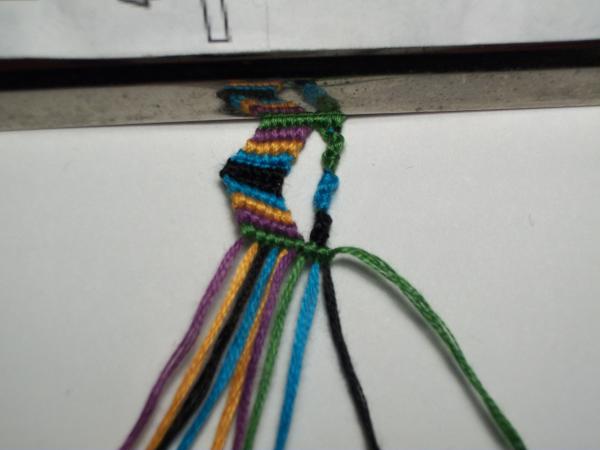
Step 3
after completing three stripes like this (adding the green and turquoise) begin the fourth (black), but make the last knot a f/b knot.
Step 4
Then, using the same string you used for the f/b knot, go back across these strings until you get back to the first string of this bunch, and then make three more stripes from right to left.
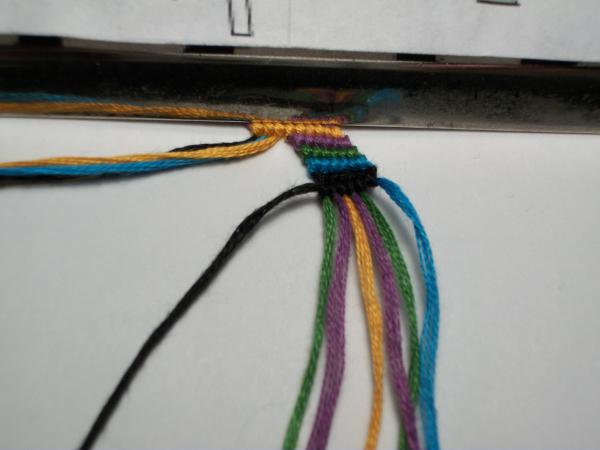
You should wind up with a 'zig' going PGTBBTGP.
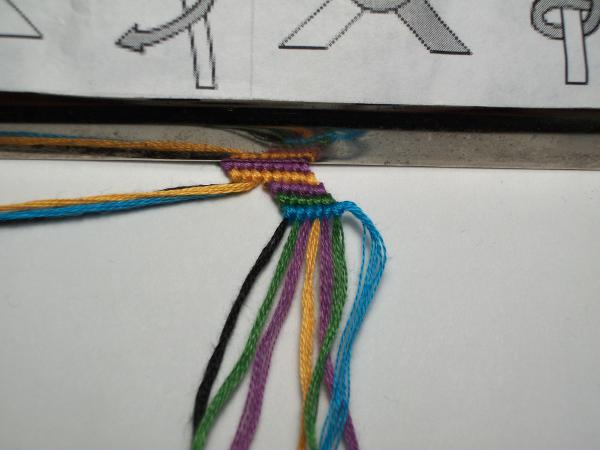
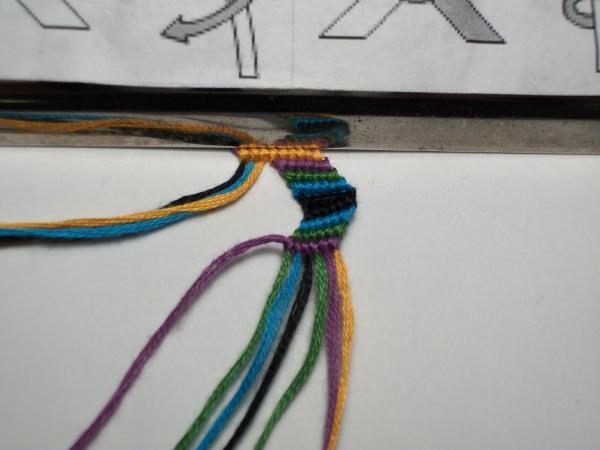
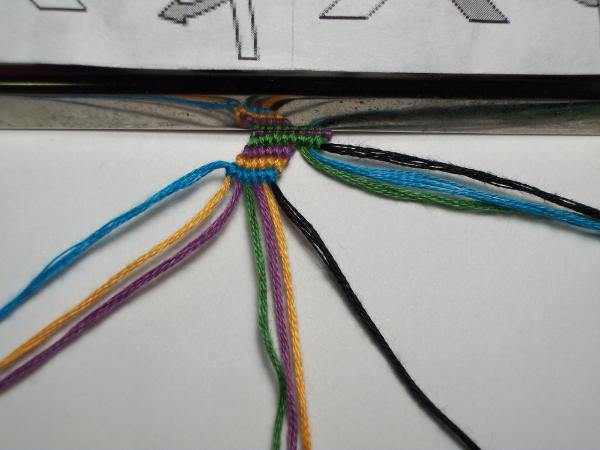
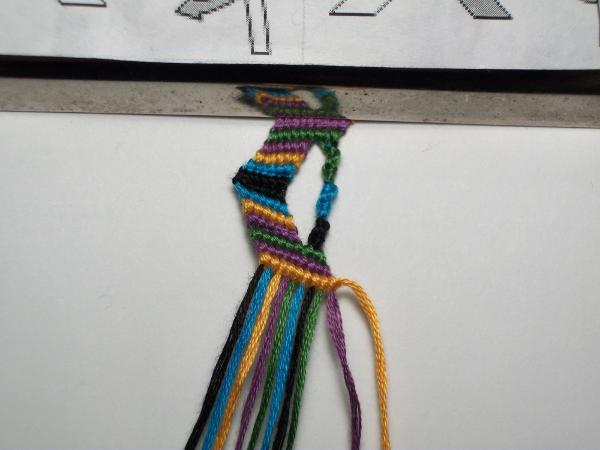
Step 5
Now, go to the strings you had set aside and make a Chinese staircase. Note what order they're in, you'll need it later. You may choose to do this with all one color, or with multiple colors. If your bracelet is being made with ten strings, fifteen to eighteen stitches of this should be the right length for this section. I made six of each color.
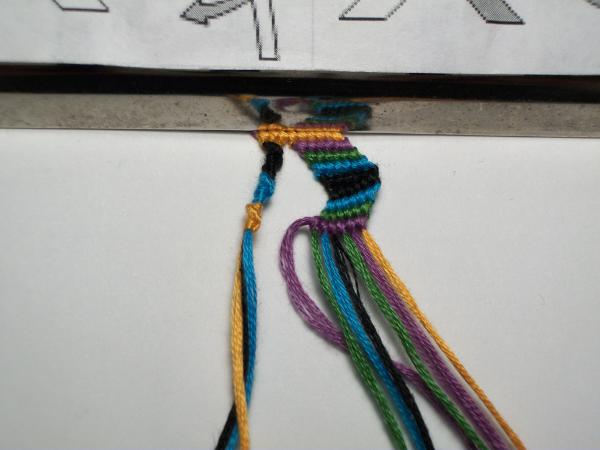
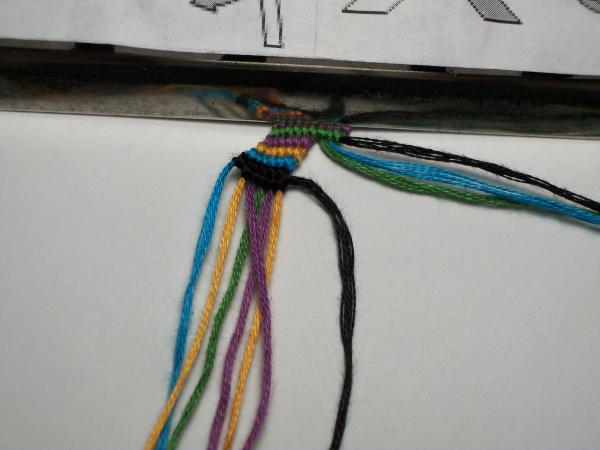
Step 6
Once you have completed this, it is time to rejoin the two. Take the rightmost string (orange) from the bundle that has been doing diagonal stripes and continue with this string, but once you reach the end of the "stripes" section, tie onto the strings of the Chinese Staircase pattern (this is where you need that note from earlier!), one by one, continuing the stripe across.
Step 7
Complete two more stripes like this.
Now, take the three rightmost strings and ignore them - these will be your Chinese Staircase. 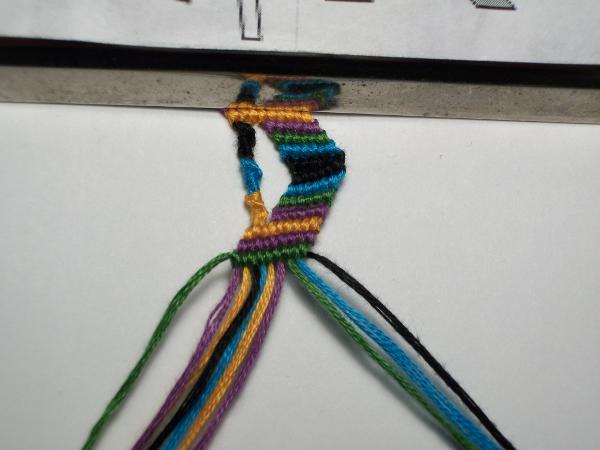
Step 8
Using the strings in the left-side bunch, make three more stripes,
Step 9
then "zag" back toward the center with the fourth and a b/f knot.
Step 10
Three more stripes
Step 11
Chinese Staircase

Step 12
Join
Step 13
Two stripes
Step 14
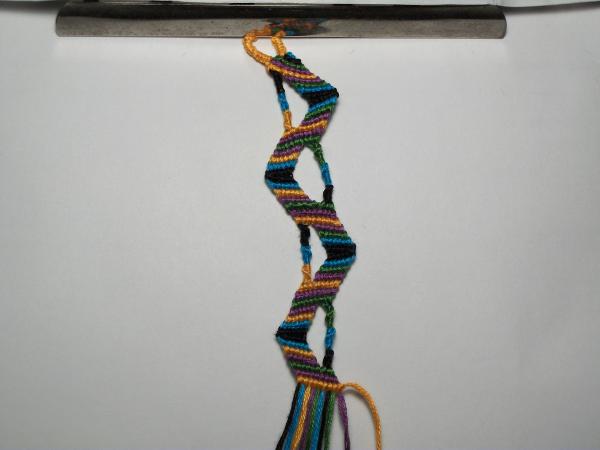
Repeat until your bracelet has reached the desired length.
Editors
The original author of this tutorial is bkwrmi but it was also edited by prpldrgnfr, k_marie and Alicat.
Uploaded photos (see all 5)


Comments