(( How to... ))Tatted borders
| Table of contents |
|---|
| 1 - The pattern I used 2 - How to knot the borders |
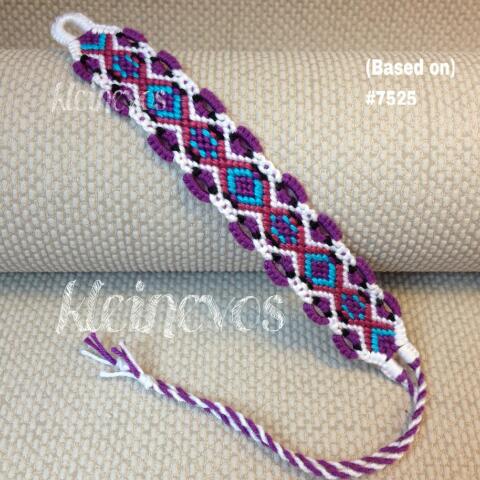
The pattern I used
is #7525For this tutorial I used a different colorscheme:

To make these 'tatted style' borders I used the shaping-technique , added border-strings, and made loops. And I tweaked a few knots :-)
The added border-strings will not be used for making knots. They are inside the loops and inside the white parts of the edges. That's also where you'll see the color of these strings.
Picture below: Everything in between the black lines will be knotted as usual, except from the white knots on the edges: They will be changed into fb- and bf-knots.
The blue lines are the 'tatted' loops at the borders.

How to knot the borders

1.
I'll start this bracelet with a loop, also called larksheadknot buckle. Also see shaped starts for normals.
To make the borders you need two extra, shorter, dark-red strings at both sides (the added border-strings) besides the regular strings for the pattern,
2.
I'm starting this bracelet at row 17.
Start knotting as usual untill you've knotted the white lines under the light-red cross.
3.
*The text below is for the rightside border, the leftside is ofcourse the same, but mirrored.
Now make a backward knot with white, onto dark-red and the two added border strings together.
*In the original pattern the white string would stay on the outside, but I wanted dark-red to be on the outside to use for the loops.
4.
The shaping will start from here:
Make a fb-knot with green onto white.
5.
Make a fb-knot with the next string (dark-red) onto white and green together.
6.
Make a fb-knot with the next dark-red string onto white,green and the previous dark-red together.
7.
Now the shaping has to go the outside:
Leave the last used dark-red out of the bundle.
Make a fb-knot with the other dark-red onto green and white together.
8.
Make a fb-knot with green onto white.
9.
Now on to the 'tatted' loop:

10 and 11.
Take the (longer) dark-red string on the edge and make some larksheadknots ( or bf-knots ) around the added border-strings. I made 5 knots. For a bigger loop you can make more knots.
12.
Knot the white string that comes out of the shaped part around all three dark-red loop-strings.
13, 14, 15.
Proceed with the pattern.
At the edge, the white string makes a bf-knot onto both added border-strings and the other white string together.
16.
The left side is also knotted now.
17.
At this point the white string goes inside again, with a backward knot onto all 3 dark-red strings (two border-strings and one pattern-string).
18.
Keep knotting.
*note: It's probably easier to keep everything nice and tight if you first knot the shaped parts and the pattern-part before making and attaching the loop.

19 -22.
The edges of the second part of the pattern are just like the first part. Only difference is that the white part of the borders is one knot longer:
First white knot is a forward knot, than two bf-knots, last one is a backward knot.(From top to bottom.)
*Note that the white string is always knotted onto one other string and both added border-strings together.
23.
Shaping time again :-)
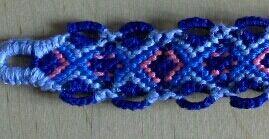
Close up:

Editors
The original author of this tutorial is kleinevos .
Uploaded photos (see all 1)
Comments