(( Closures )) How To Tie Your Bracelet to Your Wrist
This tutorial describes a method for tying your bracelet so that it will stay there securely, you can tie it on yourself without help, is easy to remove when you want to, and extends the lifetime of the bracelet by not putting all of the strain on a single point of the braid/closure.This method works for bracelets with a Larks Head buckle, or a Half Hitch Knot Buckle buckle at the top of the bracelet and two braids at the bottom.
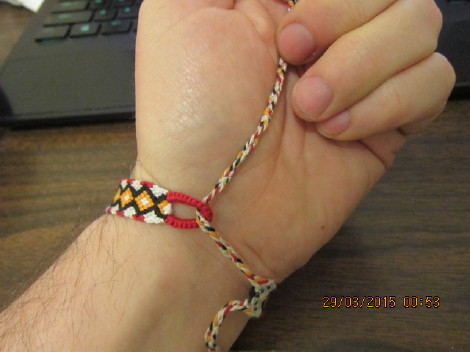
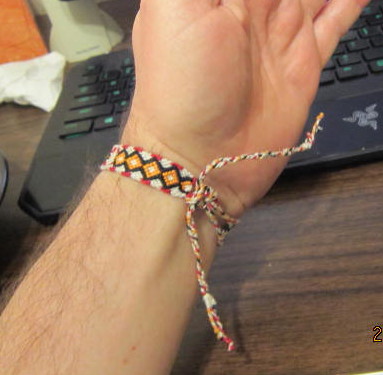
Step 1: Put the buckle at the base of your thumb and wrap the bracelet around your wrist. Take the upper of the two braids and pass it through the buckle towards your fingers. Hold the end of the braid against your palm with your fingers as shown in the picture.

Step 2: Take the lower braid, pass it through the buckle and down your arm. Adjust how tight you want to wear your bracelet here. As you continue tying, the bracelet will tend to loosen a little bit, so make the bracelet snug.

Step 3: Take the lower braid, pass it through the buckle again, but this time lead the end upwards.

Now both braids are on the same side of the bracelet, so you can hold both of them with your fingers.
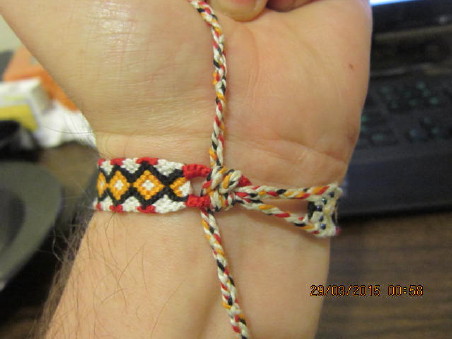
Step 4: Take the braid that was originally the top braid and pass it through the buckle, leading downward.

When you pull this braid tight, it should secure the loop from the other braid.

Step 5: Repeat what you did in step 3 with the new lower braid.
Step 6: Repeat step 4.
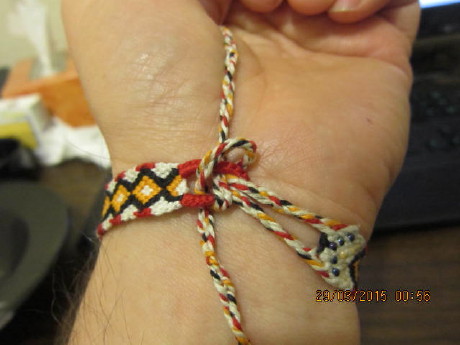
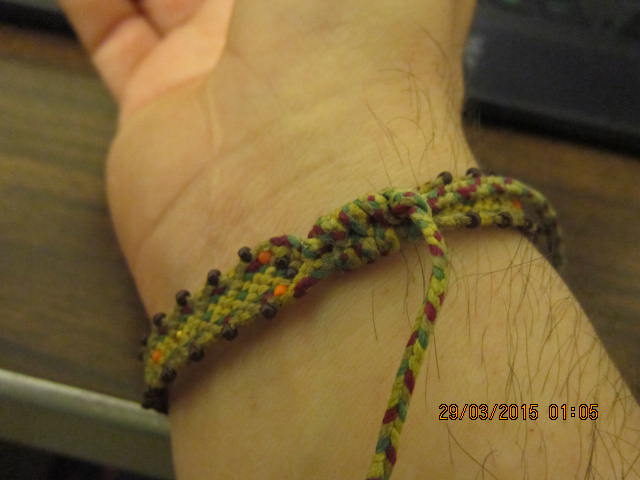
Step 7: What you do at this point depends on how much room is left inside your buckle. If there is enough room, you should repeat steps 3 and 4 one more time so that there are a total of 3 loops on each side. If there is not enough room (as in this example), then you can omit the third set of loops.
You can optionally tie the ends of the braids with an overhand knot. This knot will keep the braids together, but it is not actually holding the bracelet on. The loops from the above steps are what holds the bracelets on.
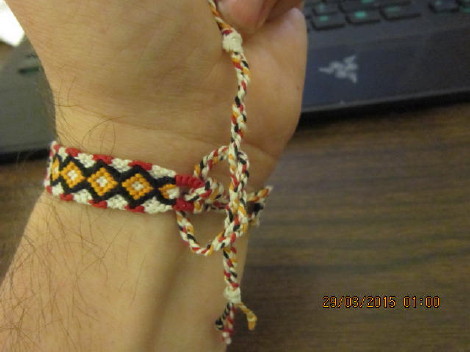
Final result, and an example on the left hand using 3 loops.
To take off the bracelet:
- Undo the overhand knot, if there is one.
- Find the first loop (i.e. the last one you made when you put it on), which should be along the top edge of the bracelet, and gently pull the braid back through the buckle.
- Loosen the loops in the reverse order you made them until you can remove the bracelet.
In order for this method to work, you need a fairly large buckle and fairly long braids.
The more strings in the bracelet there are, the thicker the braids will be, and more room will be needed to fit two or three loops through the buckle.
You want the braids to be long enough so you can hold them in your fingers when you are making the last set of loops.
Editors
The original author of this tutorial is EdBlair .
Comments