(( Patterns )) How to tie #11834
Hi,
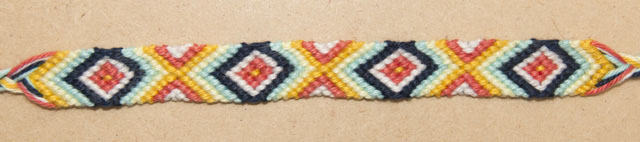
I bought this bracelet from a street vendor while I was on holiday in Panama. I really
liked it and I've figured out how it was made and I like to share it with you.
For this bracelet you will need 12 strings in six colours, the strings should be about 80 cm long.
For this tutorial I used the colours Orange (A), White (B), Dark Blue (C), Turquoise (D), Light Yellow (E) and Yellow (F).
To start put the strings in this order ABCDEF FEDCBA
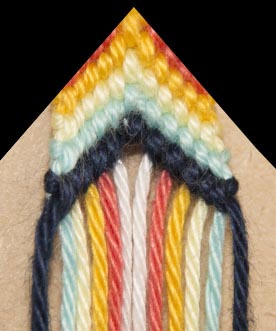
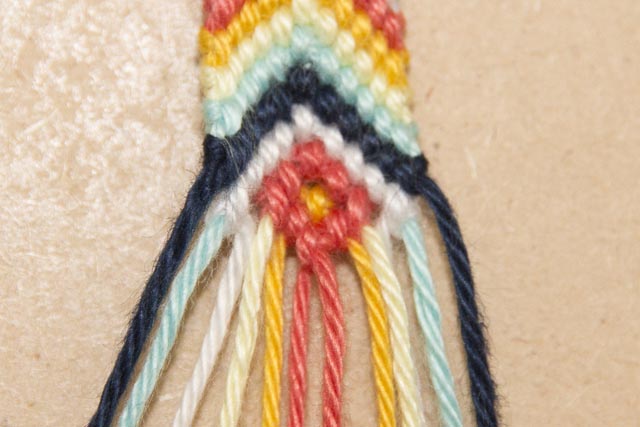
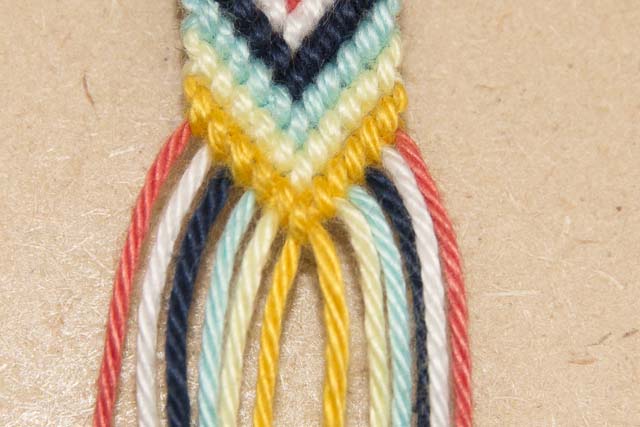
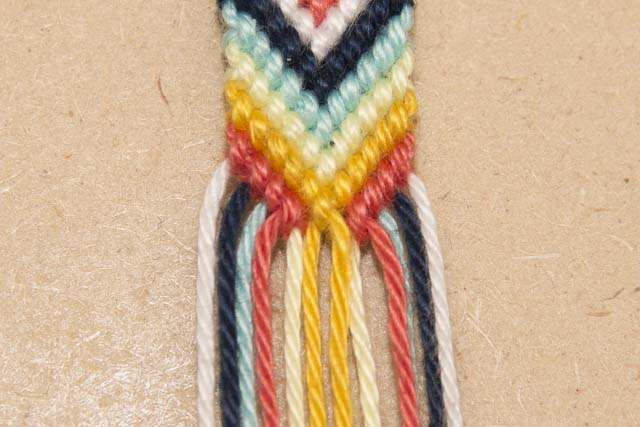
Step 1:
Make 4 upside down chevrons (^). To do this start with the middle strings, make a fwk with F (yellow) on F, then with the left F make bwk over E, D, C, B and A, with the right F make fwk over E, D, C, B and A. Make 3 more chevrons with E, D and C.
Step 2:
Again start making an upside-down chevron with B (white) only make a single bwk + a single fwk on D (turquoise) on the left side and a single fwk + a single bwk on the right side, don't knot over C (dark blue).
Step 3:
With A (orange) start making an upside down chevron only make a single bwk + single fwk on E (light yellow) on the left side and a single fwk + single bwk on E on the right side, don't knot over B, D and C.
Step 4:
Make a fwk with F & F.

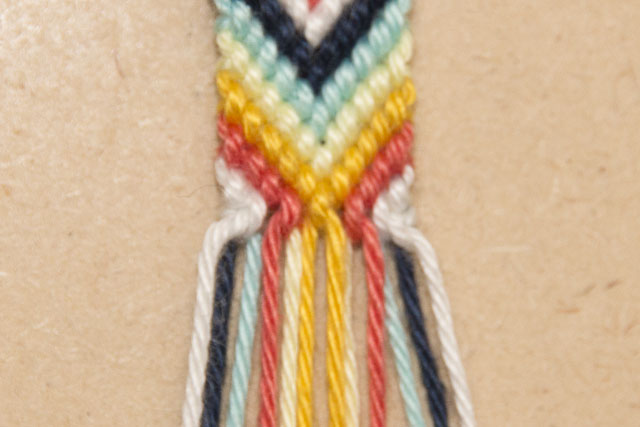
Step 5:
With the left A (orange) make make a fwk on F next to it. With the right A make a bwk on F next to it. Then make a fwk with the left A on the right A.
Step 6:
With the left B (white) make fw knots on E, F and A. With the right B make bw knots on E, F and A. Then make a fwk with the left B on the right B.
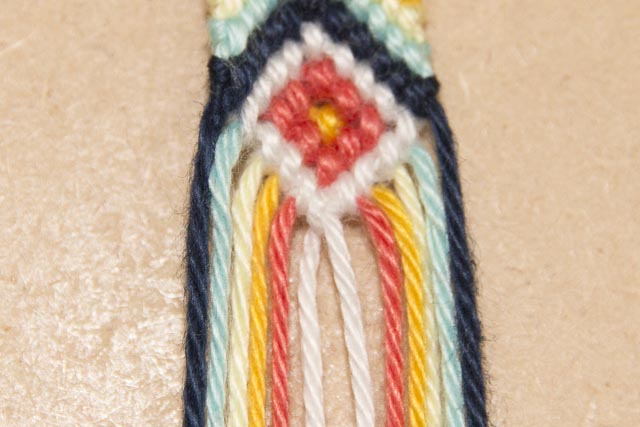
Step 7:
Now you finish the square with dark blue. With the left C (dark blue) make fw-knots on
D, E, F, A and B. With the right C make bw-knots on D, E, F, A, and B. Then make a fwk with the left C on the right C. (Normal chevron (v))
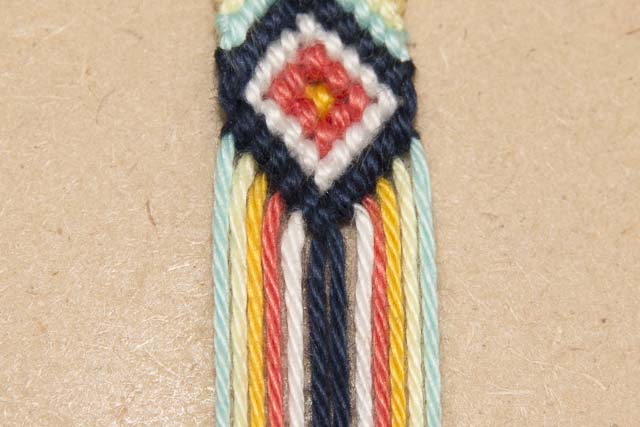
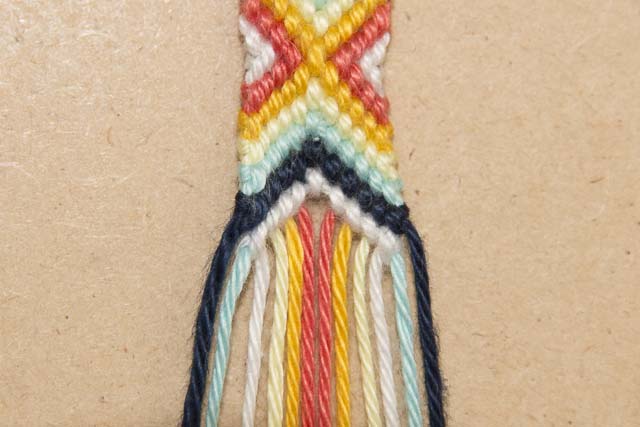
Step 8:
Make 3 more normal chevrons with D, E, and F.
Step 9:
With the left A (orange) make fw-knots on B, C and D, then make a single fwk + a single bwk on E (light yellow). With the right A make bw-knots on B, C, and D then make a single bwk + a single fwk on E.
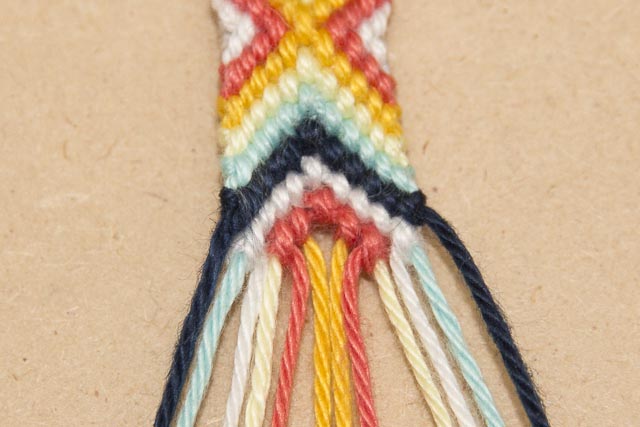
Step 10:
With the left B (white) make a fwk on C, then make a single fwk + a single bwk on D. Make a bwk on C. With the right B make a bwk on C, then make a single bwk + a single fwk on D. Make a fwk on C.
Step 11:
With the left A (orange) make bw-knots on D, C and B. With the right A make fw-knots on D, C and B.
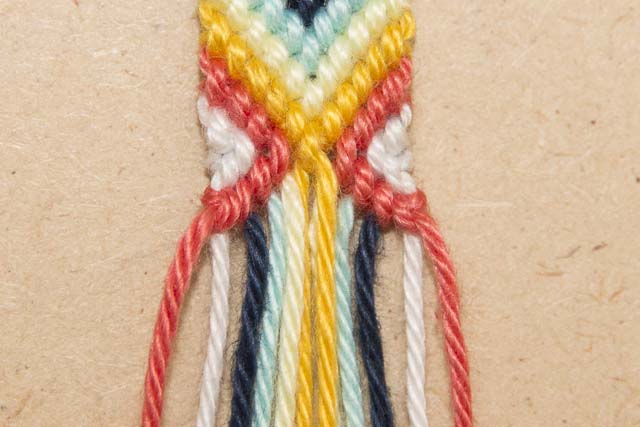
Now your strings are at the starting position again, go back to step 1 only you don't have to make a forward knot on F & F (yellow)
I hope this tutorial is clear otherwise feel free to ask :)
Have fun, Lucifix
Editors
The original author of this tutorial is Lucifix but it was also edited by k_marie, Foz, TBSNBubblegum, Jeckle, HarleyMama23 and Acid.
Uploaded photos (see all 1)

Comments