(( Bracelets )) Tonosi Bracelet
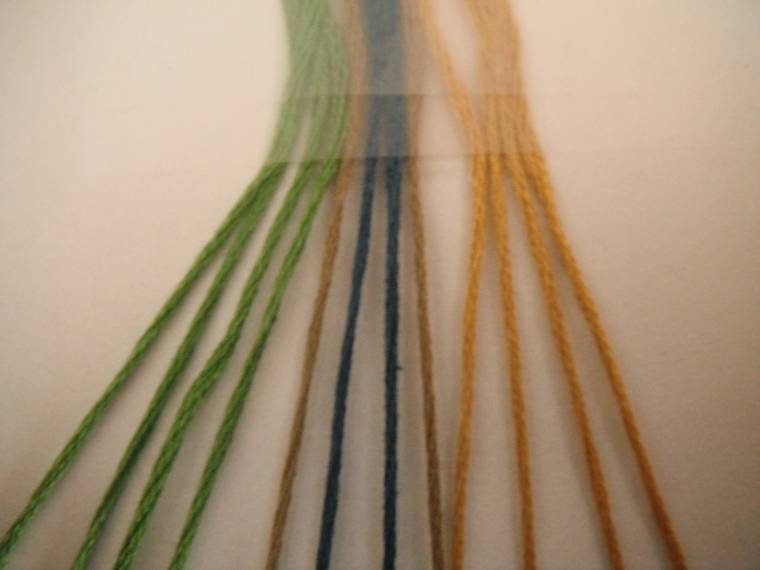
Materials and Set Up
Twelve strings, 4 colors 2 of 2 and 4 of 2
Set Up: 1 1 1 1 2 3 3 2 4 4 4 4
Step by Step
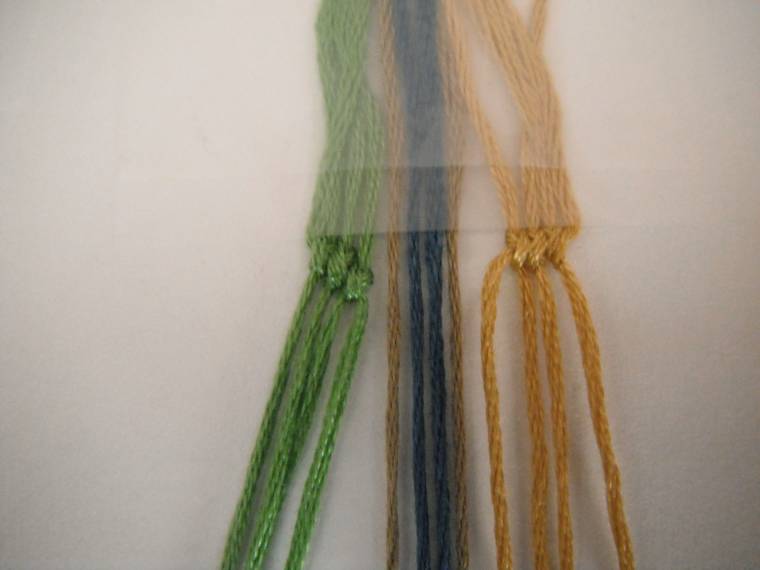
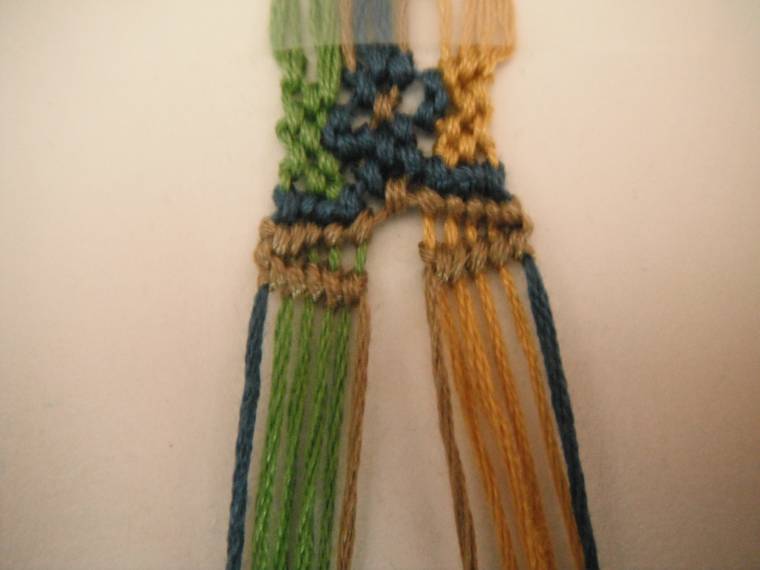
Step 1
You'll begin by taking the farthest out green string and tying forwards knots down all the other green strings. Stop after you?ve tied a knot on the last green string. Do the same on the other side with the yellow string, but using backward knots instead of forward knots. Stop after you've tied down all the yellow strings.
Step 2
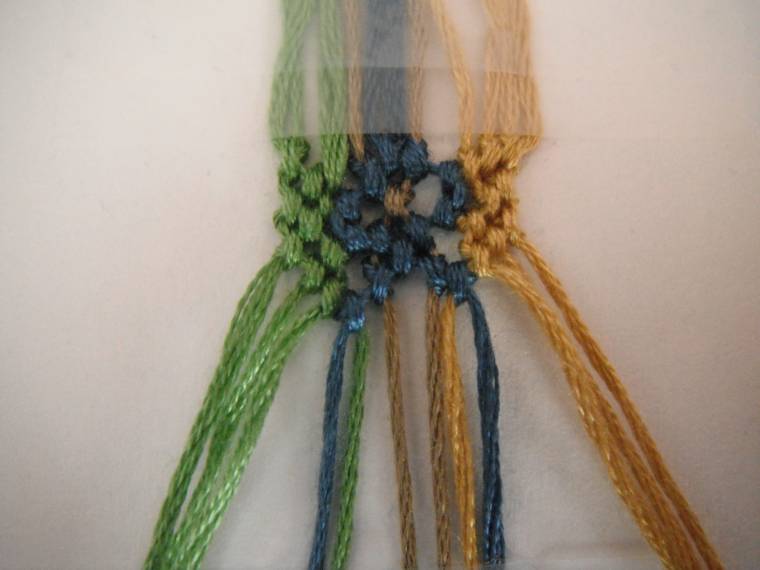
Now take the blue strings in the middle. Tie a forward knot with the one on the left onto the string on the right.
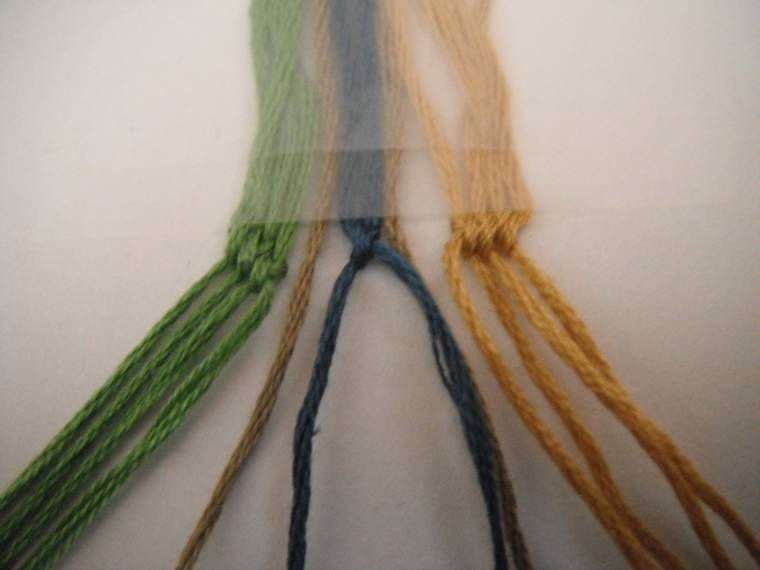
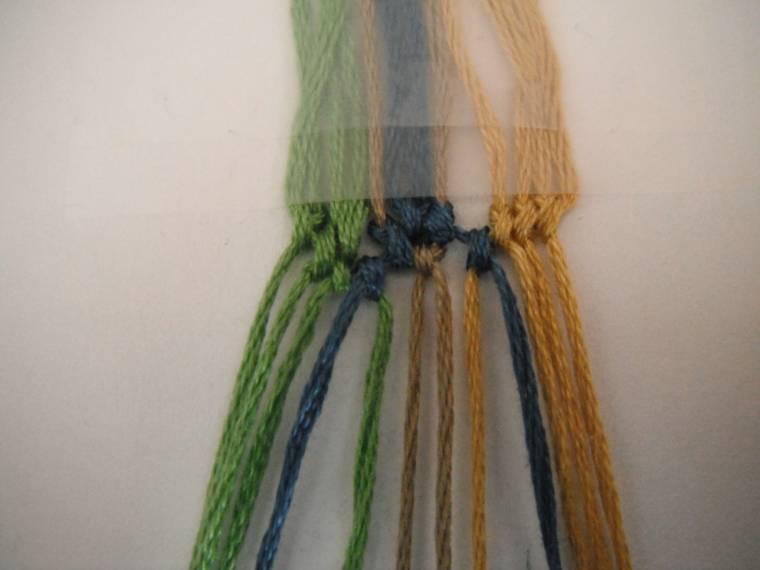
Step 3
Using the blue string on the left, tie a backward knot onto the brown string next to it. Do the same with the blue string on the right, but tie a forward knot.
Step 4
With the blue string on the left tie a backward knot onto the green string it?s now next to. Using the blue string on the right tie a forward knot onto the yellow string immediately next to it. 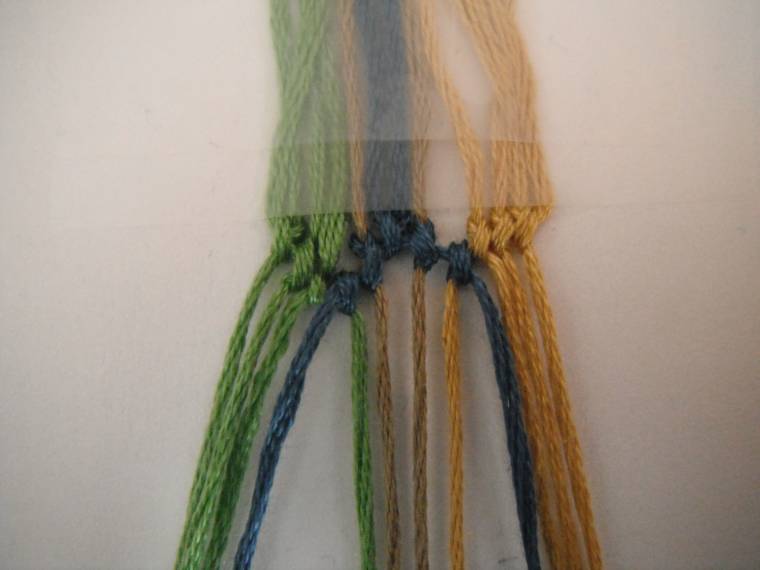
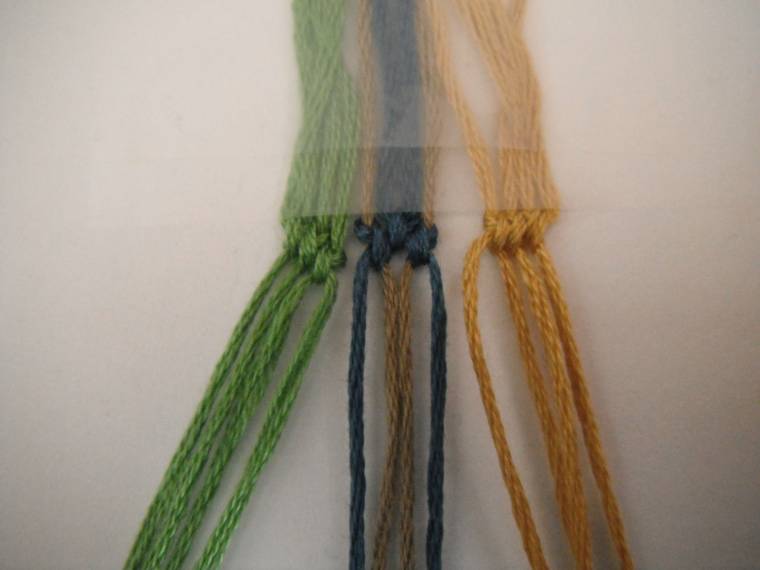
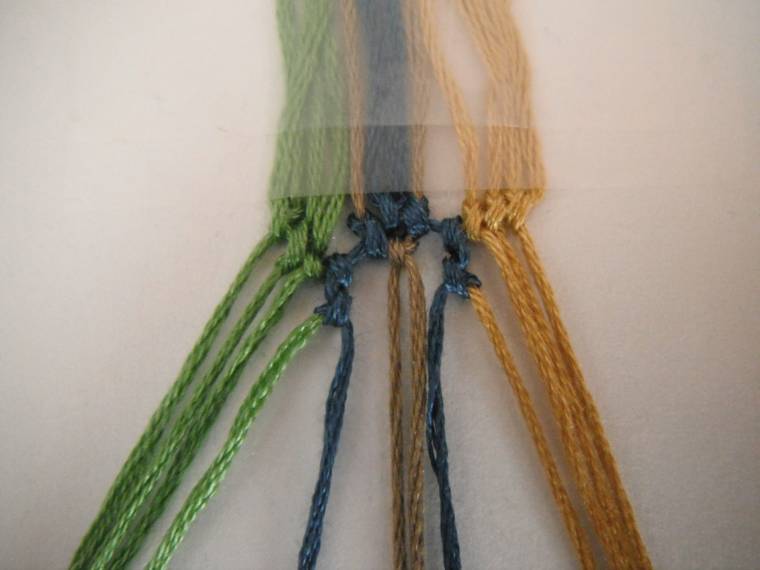
Step 5
At this point your two brown strings should be next to each other in the middle. Tie a forward knot with the one on the left onto the brown string on the right.
Step 6
For this step you?ll be working with the blue strings again. Even though you already tied a knot once onto the green and yellow strings, you?re going to tie knots again. The only difference is this time you?ll take the blue string on the left and tie a forward knot onto the same green string as before. With the blue string on the right, you?ll now be tying a backward knot onto the same yellow string as before. This will flip your blue strings around so now they are back on the inside of the yellow and green strings.
Step 7
Now that your blue strings are back by the brown strings, tie a forward knot with the blue string on the left onto the brown string next to it. With the blue string on the right, tie a backward knot onto the brown string next to it. Both of the blue strings should be in the center now.

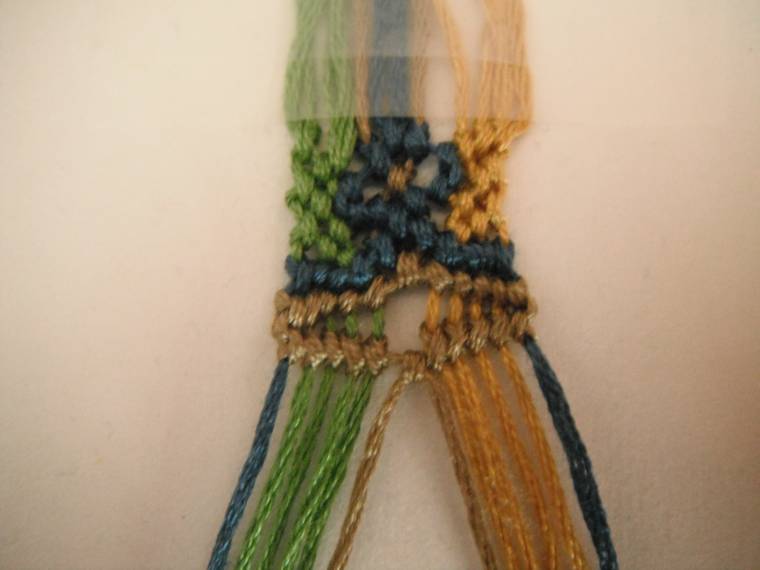
Step 8
Tie a forward knot with the blue string on the left onto the blue string on the right.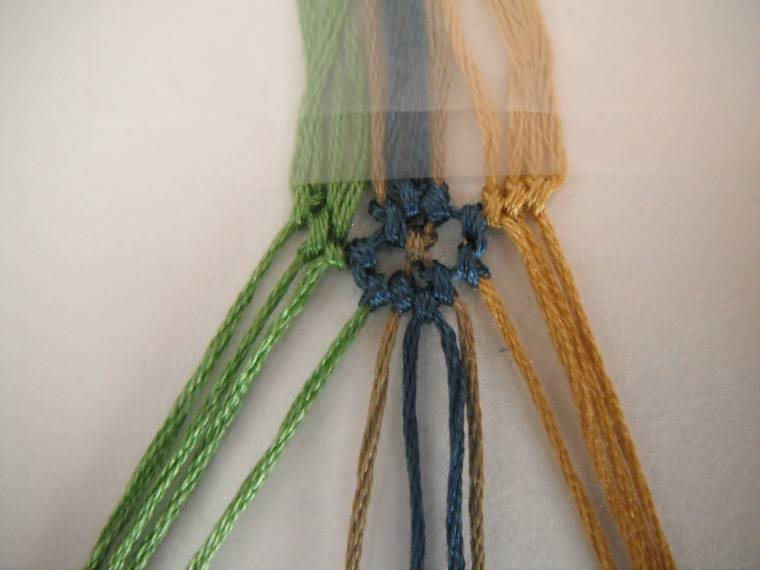
Step 9
In step ten you?ll begin working with the green and yellow strings again. All you have to do is repeat step one twice. When you're done there should be three rows of yellow or green on either side. 
Step 10
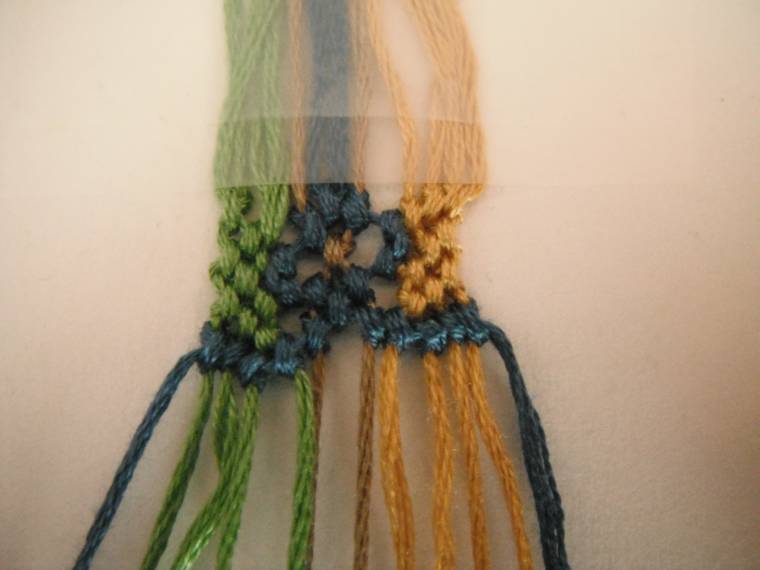
Now you?ll start to work with the blue strings again. Taking the blue string on the left, tie a backward knot onto the brown string next to it, and another backward knot onto the green string immediately after the brown one. With the blue string on the right, you?ll tie a forward knot onto the brown string next to it, and another forward knot onto the yellow string right after that one.
Step 11
For this step continue making backward knots with the left blue string down the row of green strings. Stop when you?ve tied a knot on the last green string. With the blue string on the right, continue to tie forward knots until you reach the end of the yellow strings.
Step 12
In this step the two brown strings should now be in the middle. Tie a forward knot with the brown string on the right onto the brown string on the left. For the rest of this step repeat steps eleven and twelve until you?ve tied all the way down the rows
Step 13
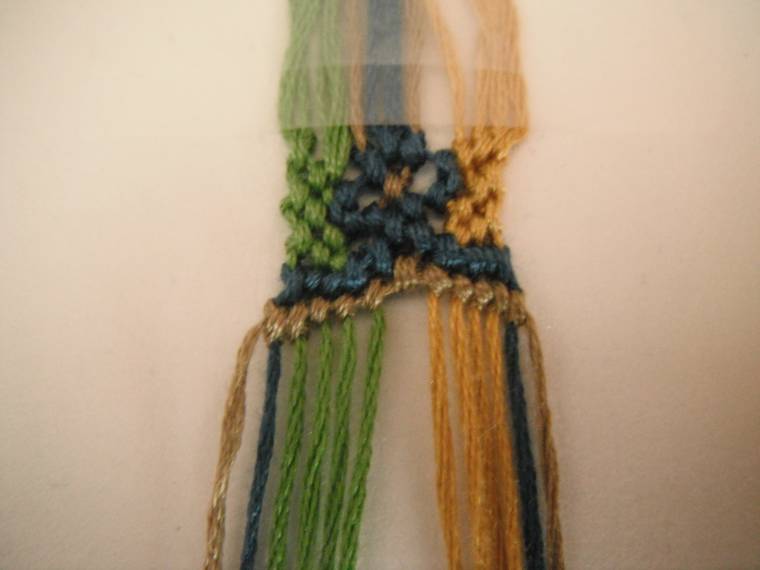
This step is similar to step seven in the way that you will be retying knots onto the same string as before. Using the brown string on the left, you will now make a forward knot onto the last green string, even though you?ve already tied a backward knot onto it. With the brown string on the right tie a backward knot onto the last yellow string you just tied a forward knot onto.
Step 14
With the brown string on the left tie forward knots down and stop after you?ve tied a knot on the last green string. With the brown string on the right, tie backward knots all the way down the row and stop after you?ve tied onto the last yellow string.
Step 15
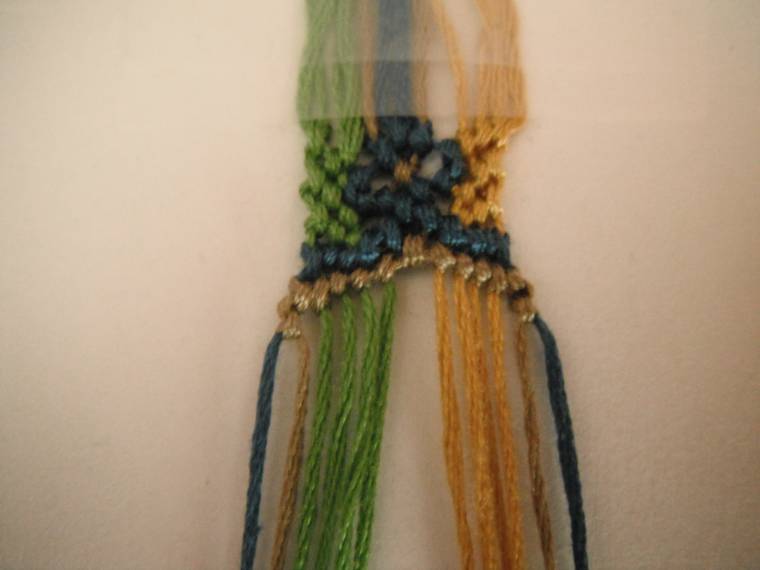
Now that the two brown strings are next to each other in the middle, tie a forward knot with the brown string on the left onto the right brown string. Don?t worry if you have a big diamond-shaped space. It?s supposed to look that way!
Step 16
Now you?ll be working with the blue strings again. All you have to do is take the blue string on the left and start tying forward knots down the row and stop after tying onto the last green string. With the blue string on the right, tie down the row and stop after tying onto the last yellow string. 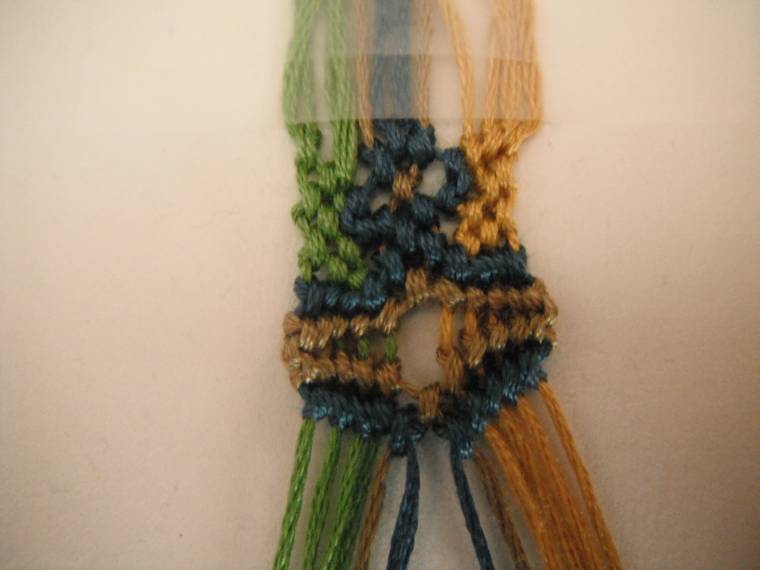
Step 17
The two blue strings should now be next to each other in the middle. Using the blue string on the left tie a forward knot onto the right blue string.
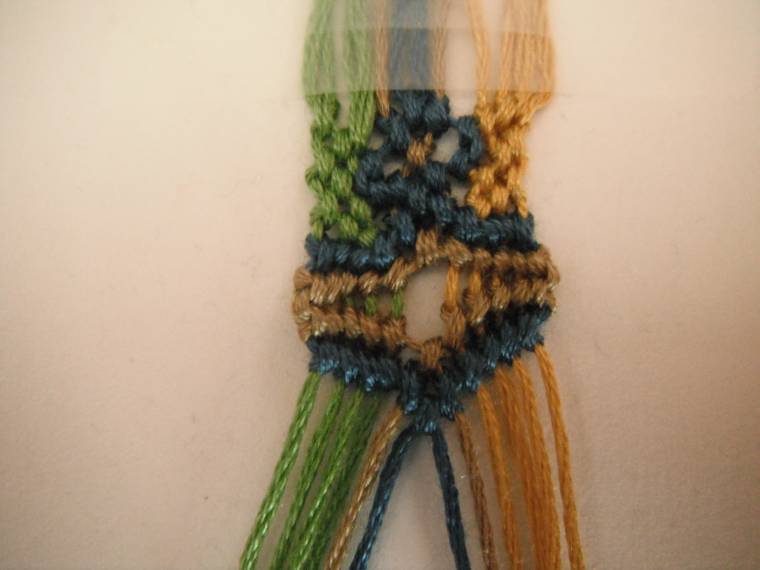
That's it! After completing step 17, restart with step one and work until the bracelet it a satisfactory length.
Editors
The original author of this tutorial is Fond_Of_Owls but it was also edited by Foz, Kestrel, craftygirl98, k_marie and Alicat.
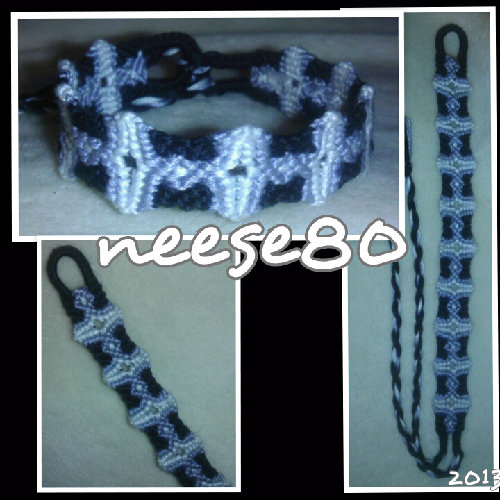
Uploaded photos (see all 1)
Comments