(( Buckle )) Macrame/Square Knot Buckle
Prepare
Learn knots
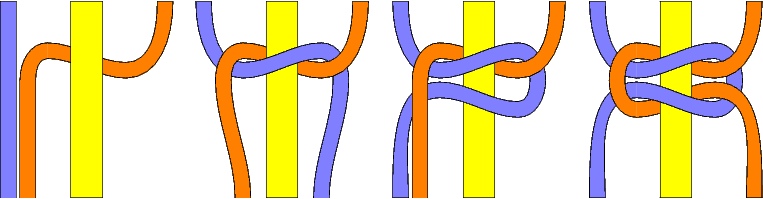
In addition to the ordinary bracelet knots, will have to learn the macrame knot (also called square knot). You can also use the ordinary forward knot as in chinese staircases, see the video in the end of the tutorial. Below is an image showing how to make the macrame knot.
Strings
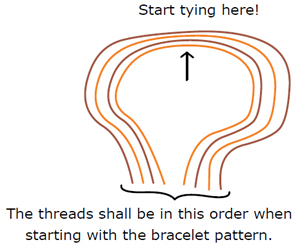
The threads should be a bit longer than when you make ordinary bracelets. Start with looking in what order the coloured threads should be in the pattern you're going to make.
Making the top loop
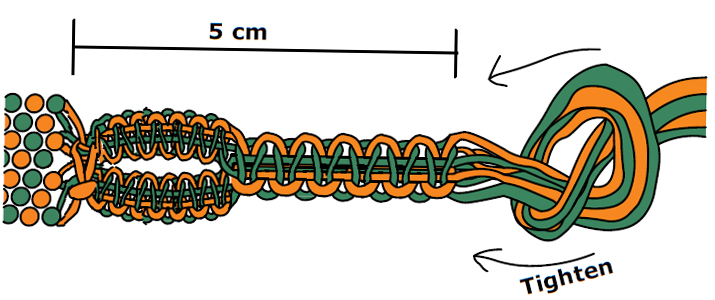
Start in the middle (as the arrow in the pic below shows) and make some macrame knots.
When you have made some macrame knots from the middle and outward it will look like this:

Now, bend the whole thing:
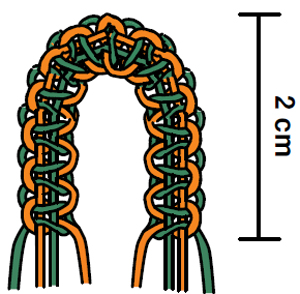
When you have bent it it should be around 2cm long total, as the image shows. Now, check the order of the threads. Are they in the right order so you can begin on the bracelet? If not, an extra macrame knot on one of the two ends will swap the outer threads and maybe turn them in the right order. The inner threads can be twisted to get the right order. Experiment a bit until the order is right and you can begin on the bracelet pattern!
Make the bracelet pattern length about 4cm less than your wrist circumference.
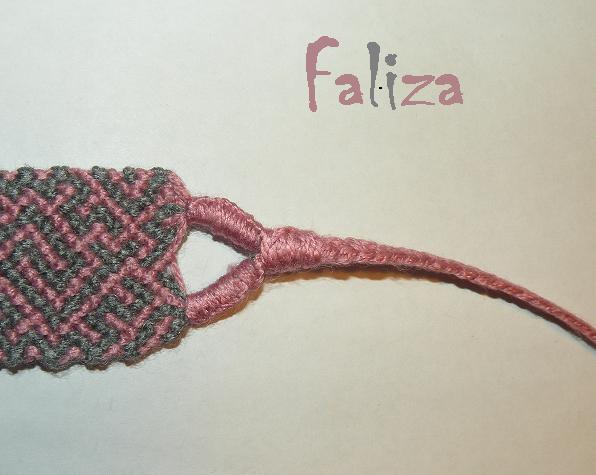
Bottom loop
When you are done, you continue like this:

Make a square knot to gather all threads, then split them into two bunches, as the three images above shows.
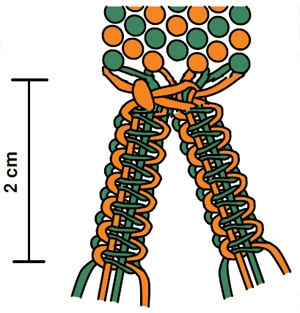
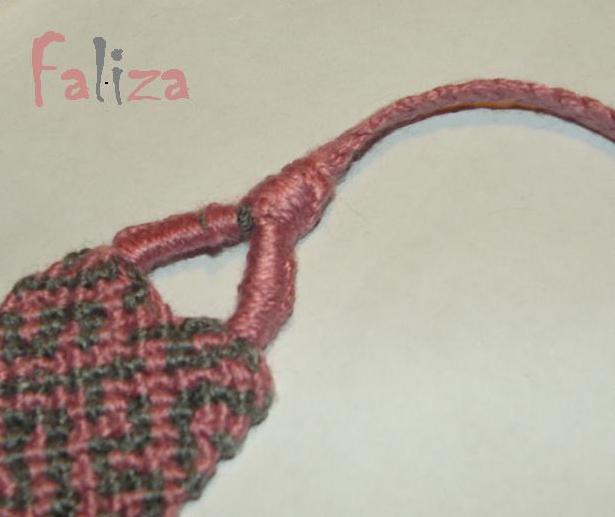
Since you have divided all threads into two divisions, continue making macrame knots in two lines. They should both be about 2cm long.
Now join all threads again, and make one line of macrame knots. Finish the buckle with a knot as the picture above shows.
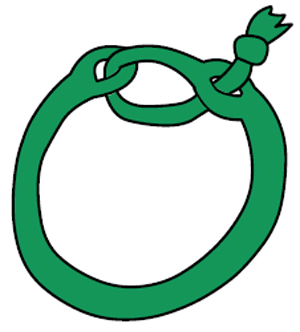
You are done! The image above shows how to "close" the buckle. The protruding knot keeps the buckle locked.
Alternate Bottom Buckle
After you finished knotting your bracelet divide your strings into two groups. Choose the longest thread, and make forward knots around all the threads of that group, as you would if you were making a chinese staircase.
Do the same thing with the other group of strings, until you've covered the same amount of length with forward knots. When you've reached to desired length (approx. 1.5 cm depending on the width of your bracelet), pull both groups towards the centre and knot them together with a forward knot. Make a few forward knots to keep it all nice and tight, and then continue to braid the ends until it's long enough to tie.

Videos
The Buckle: Russian with English Subtitles
Making the Buckle
Making the top loop
Making the bottom loop and end
Soda Tab Buckle
by fieldhockey08
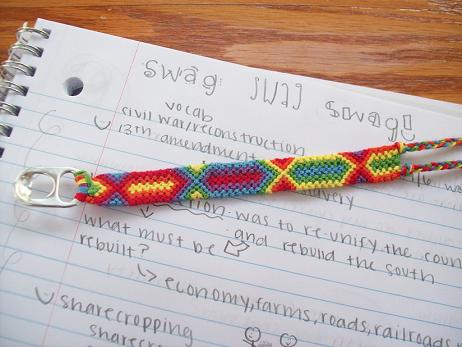
You will need a soda can tab with two holes in it for this.
The strings for your bracelet must contain an even number for each color.
Say you are doing a 4-string bracelet, just to be simple. Two red strings, two yellow. Cut one red string twice as long as you want each string to be, and do the same with the yellow.
Next, fold each string in half and use larks head knots (if you are not familiar with these, check out the tutorial, larks head knot for keychains) to attach the strings onto the tab, keeping them all on one of the holes. It does not matter which hole you use.
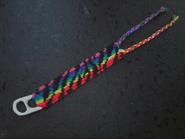
Once you have knotted as far as you are going to knot, make two braids on the ends that are at least 2 1/4'' long.
To fasten, place one braid through the other hole of the tab, then knot the two braids together, securing the bracelet.
Here are some examples (by fieldhockey8):
:)

Editors
The original author of this tutorial is Stefan but it was also edited by livindncngdream, sameeha30, fieldhockey8, Gracie04, Sareana, Foz, Alicat, squeaker14 and Masha_Knots.
Uploaded photos (see all 40)


Comments