(( Embellishments )) Beaded Kumihimo
| Table of contents |
|---|
| 1 - Supplies 2 - Steps 2.0 - 1) Prepare the strings 2.1 - 2) String your beads 2.2 - 3) Prepare your disc 2.3 - 4) Add the beads 2.4 - 5) Finish the bracelet 2 - videos |
* Make sure you know and have a good grasp on regular kumihimos before trying beaded ones.*
I've finally gotten around to writing a tutorial for this, after getting a lot of response on the one I uploaded on here. I've included the video I learned from at the end, but let me know if you'd like pictures as well. Hope it's helpful!
Supplies
- Beading string
- For a bracelet, I use ~2-2.5 feet, which includes extra for assurance
- I use Beadsmith No-stretch Nylon, size 2
- Seed beads
- I use size 11 seed beads, but you can use whichever size you prefer
- Beading needle
- Not completely necessary, but highly recommended. It will make stringing the beads much, much easier. I like big eye needles.
- Findings for the ends
- You can use end caps or cones or use a clasp and jump ring
- A kumihimo disc, of course!
Steps
1) Prepare the strings
- There are different ways to start, depending on what type of findings you use. If using a clasp and jump ring, cut half as many strings (4 strings for an 8 string bracelet) at double the length you need and attach them to your clasp using lark's head knots. (Click here if you don't know how to do them.) If using caps or cones, just cut as many strings as you need and tie them together at one end, like a normal kumihimo.
2) String your beads
- Using a beading needle, if you have one, add beads equal to the length of your project to each strand (usually ~5.5-6 in for a bracelet). At the end of each strand add a stop bead.
- A stop bead will keep all your beads on the string, but can easily be removed, along with extra beads when you're finished. To make one just add a bead on and then loop your string back through it, almost like tying a knot around the bead. When you're finished, you can slide the stop bead off the end of the string to remove extra beads and finish your bracelet off.
3) Prepare your disc
- Set up your disc just like a normal kumihimo. If making a pattern, be sure to put your strings in the right order.
- If using cones or caps as your findings, do a few passes with just the string (no beads yet!) to create a small tail to put in the cap. You can also do this if using just a clasp if you prefer the look, but it's not necessary.
4) Add the beads
Note: When doing kumihimos, I go right down, left up, but if you do the opposite just switch these directions around.
- Take your top right string and drop 1 bead down into the center as you cross it over. Before securing the string in the bottom slot, make sure the bead hooks under the first string you cross over (right top string). Then take the bottom left string and do the same thing, dropping a bead down and hooking it under the first string you cross (left bottom string). Then turn you disc, and repeat until you've reached your desired length!
5) Finish the bracelet
- Once you've reached your desired length with the beads, do a few passes with just the string to secure the beads and provide a small tail if using caps.
- If using caps or cones, tie your strings together, trim the excess, and then attach the caps to your bracelet.
- If using a clasp and jump ring, make sure to keep your strings together so they don't unwind and tie them to a jump ring. A beading needle can be useful here as well. Add a bit of glue to the knot and let it dry before trimming the excess.
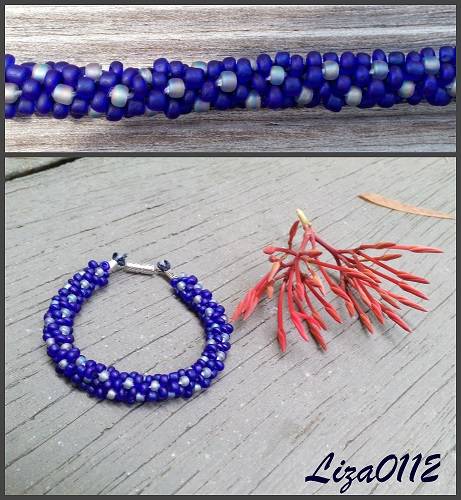
And there you have it - a beaded kumihimo!
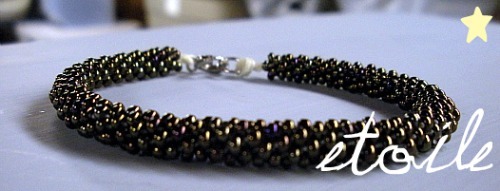
You can make solid color ones, or use multicolored ones using the patterns on here. You can also use different sized and shaped beads for different looks. I didn't really find any text instructions for beaded kumihimos anywhere else online, so hopefully these are helpful for those who need or want them! Here's the video I learned from, but like I said before, let me know if you'd like pictures.
videos
Editors
The original author of this tutorial is etoile but it was also edited by Jeckle, k_marie, Kestrel and kleinevos.
Uploaded photos (see all 23)


Comments