(( Buckle )) Chinese Staircase-Odd Strings
| Table of contents |
|---|
| 1 - Chinese Staircase Buckle 2 - Alternate Buckle 2.0 - Getting started 2.1 - Choosing the position of the threads 2.2 - Organising the threads 2 - Alternate Buckle 2 |
Chinese Staircase Buckle
I know that the bracelet buckle for this site is used for even strings, but I have a way to create a buckle for odd strings. Actually, all you really need to know is how to create a Chinese staircase because that's what we are going to make our buckle with instead of the square knots.
(Please forgive for poor picture quality, this was done on my cellphone camera)
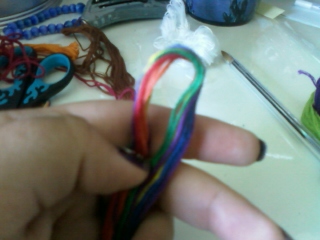
First off, take all your even threads and after folding them in half, find out how long you want your loop to be and 'mark it' with the tip of your thumb
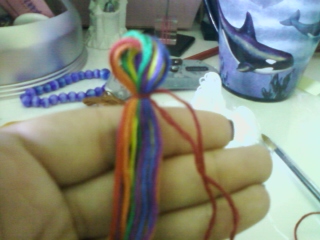
Then with the odd string, cut at least an extra foot of string for the odd string because this is what we will be using to create the chinese staircase. With one end of the Odd string, tie a single (no double overhand knots!) over hand knot at the point of your loop to hold the strings together.

Now you begin to create the chinese staircase. feel free to widen the loop so you can easily slip your fings in to weave the string around the bundle of even threads. However you are not restricted to this.
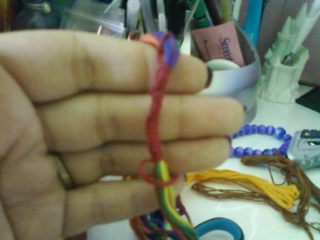
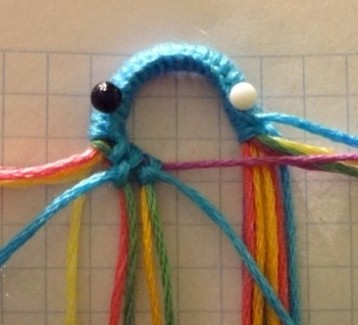
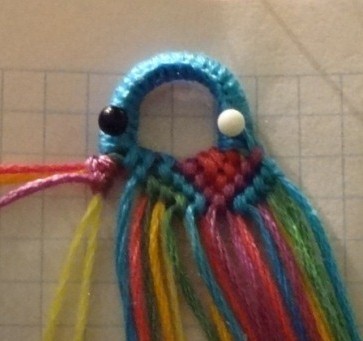
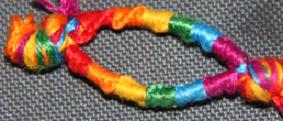
If it's easier for you, you can (AFTER you make at LEAST three chinese knots to hold the bundles in place!) untie the single over hand knot and make the chinese knot straight down with occastional check ups on lengths. However if you keep it looped with the overhand knot, it'll automatically curved to the shape of the loop. (like it's doing in this image)
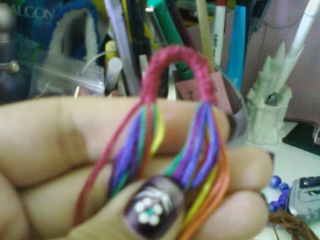
And once you attain the length of the loop, you're done! you can start tying your bracelet now!
Alternate Buckle
If you're making a pattern with an odd number of total threads, a buckle can be easily made following the explanation given in the tutorial above.
However, some patterns don't only have an odd thread count, but also an odd number of threads for several colours. We're going to focus on one of those patterns, to show that that is no reason not to start with a buckle.
Getting started
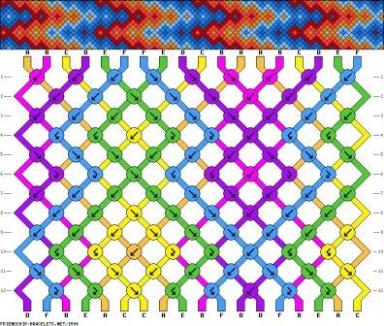
For this example I've chosen pattern #1594 which has six colours, and three threads of each colour.
We can cut two threads of each colour as though we were making a regular buckle, i.e. twice the length needed. For this pattern I'll make them 80 cm folded in half, or 160 cm before folding.
Pick one of the colours for the buckle, and make that thread 20 cm longer.
The other threads will be singles, but instead of just 80 cm we'll make them 95 cm. We'll make the colour we chose for the buckle longer still, so that one will be 115 cm.
Choosing the position of the threads
Now we'll take a closer look at the pattern, to see where we're going to put those extra threads. We could just add three on either side and wing it, but it will make it far less messy if we don't :-)
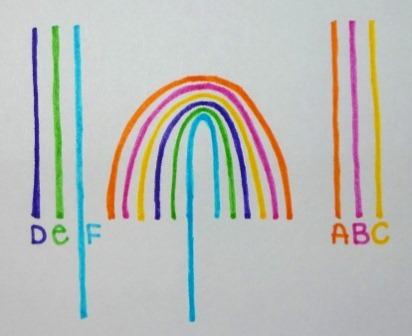
Starting on the left, there are all six colours, one after the other: ABCDEF. On the right side of the pattern, the same thing's happening. This means, of course, that the single threads will be added according to what's going on in the middle of the pattern. Therefore, we'll put colours A, B, C on the right, and D, E, and F on the left.
Organising the threads
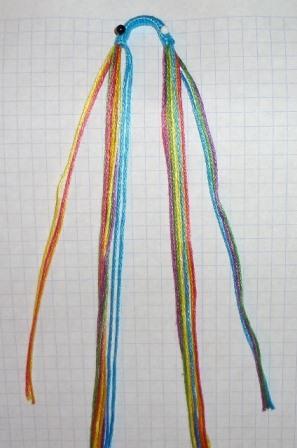
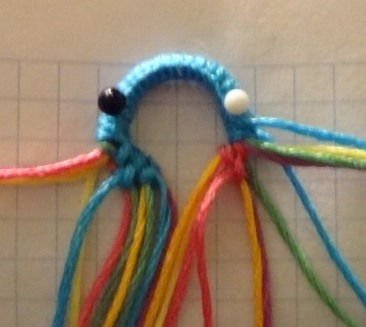
1. Fold the double threads in half.
2. Place one set of threes on each side.
3. Make sure the two longer threads for the buckle are on the same side.
4. Align them at the bottom.
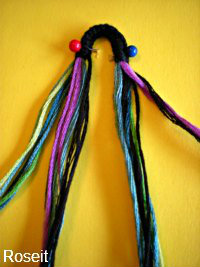
Now it should look like this:
Tie a knot in the middle and make the buckle following the instructions in this tutorial. Undo the knot, and fasten the buckle to a clipboard, or pin it down.
On both sides of the buckle there will be loose ends among the regular threads - and this was the reason why we made the single threads 15 cm longer than just 80 cm. If these bits were too short they would be a real nuisance when you're trying to knot over them.
Start knotting the way you would if those threads weren't there, but instead of knotting over one thread, knot over one of the extras as well.

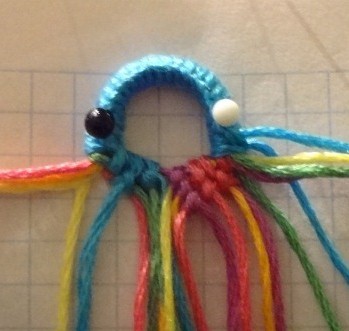
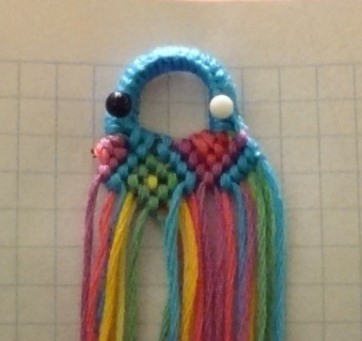
Whenever you reach a point where two threads connect which are both carrying an extra thread, just leave out one of those extras in that particular knot. Take it up again on the next knot where there is no extra one :-)
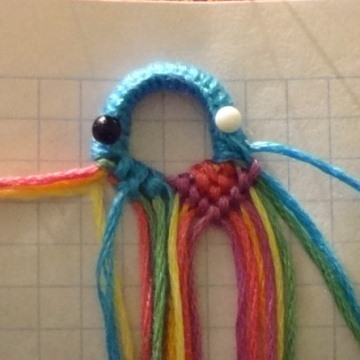
Keep working over those extra threads for about 2 cm. That should be more than enough to have secured them firmly inside the bracelet.
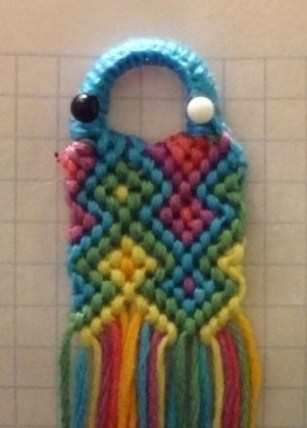
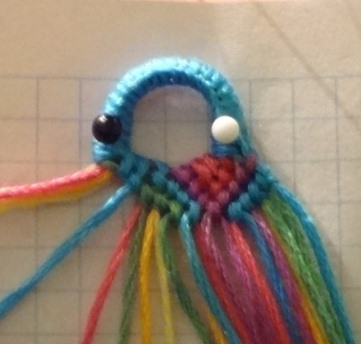
You can either push those loose threads to the side and leave them there till you've finished the bracelet, or cut them off right away.
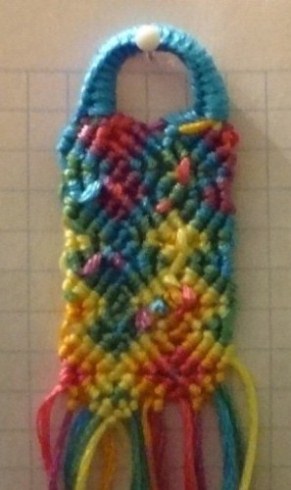
Done :-)
Alternate Buckle 2
by Kallum
This is a new way to make a bracelet buckle.
Step 1. Cut your strings, 1 STRING OF EACH COLOR, DO NOT MAKE A REGULAR LOOP!
Step 2. For example, let's say you have 10 strings. Tie a NORMAL FOREHAND KNOT WITH ALL OF YOUR STRINGS, and leave about 1 inch at the top. Now, take 5 of your strings, half of the colors, and tie 5 knots of the chinese staircase with 1 of those colors. (If you don't know the chinese staircase, see another tutorial.) Take each of your 5 strings, and tie 5 knots with each of them.
Step 3. 5 knots of 5 colors = 25 knots. DO NOT TIE MORE THAN 25 KNOTS NO MATTER HOW MANY STRINGS YOU HAVE, OTHERWISE YOUR LOOP WILL BE TO LARGE! Believe me, I know...... even 30 knots is too many. Now take your other 5 strings, and do the same thing with the other half: 5 knots of each color.
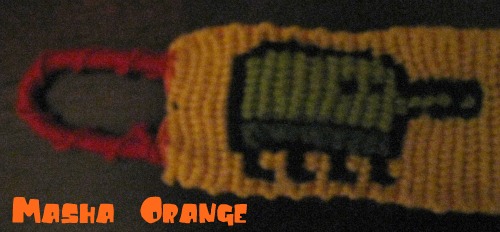
Step 4. Now take all 10 of your strings, and tie another FOREHAND KNOT with them all, joining the two pieces of chinese staircase, and voila! That is how you make my new version of a bracelet buckle. Below are pictures of my first loop/buckle of this kind:

Editors
The original author of this tutorial is Kaisui_Izumi but it was also edited by Gracie04, Sareana, Jeckle, Foz, Kestrel and Alicat.
Uploaded photos (see all 5)

Comments