(( Projects )) Tangle-Free Headphones/Earbuds
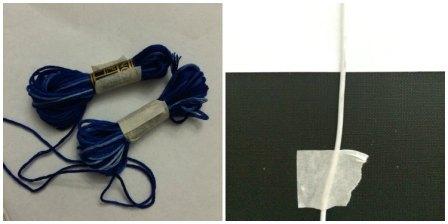
If you've ever used a cord in your life, you know they're prone to tangles. Headphones, especially earbuds, are some of the worst.If you know how to make the square/Chinese staircase knots required to make a friendship bracelet, you already have the requisite skills for pulling off this tangle-prevention headphone hack. If not, read this. You're essentially making a friendship bracelet around your headphone cables. You can use embroidery floss (which you can pick up at almost any craft store) to get the job done, you can also use wool/yarn or a thin string. Embroidery floss, however, will provide you with a softer finish and a much wider choice of colors. For some people, it will turn out kind of square-ish. Thats ok, it will still look cool and work just as well.
Chinese staircase
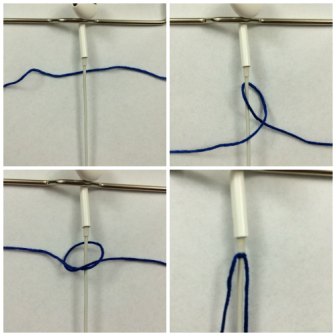
1. To Start with, just tie a normal knot at the base of the earphones (where the plug is).
2. Pin the beginning (shorter end) of the string down to the cord with your finger, and tie a basic friendship bracelet knot over the top of it.
3. Continue until you run out of string, or you want to stop using that colour. If you still have a long-ish tail of string, just trim it so it's about 1-2 cm in length.
4. When you start using another piece of string, repeat step 1 & 2 but instead of just pinning down the string you are using now, also pin down the tail from the last string.
5. Repeat until you have covered the entire cord.
6. When you come to the section where the cord splits into 2 for the ear pieces, just repeat steps 1-5.
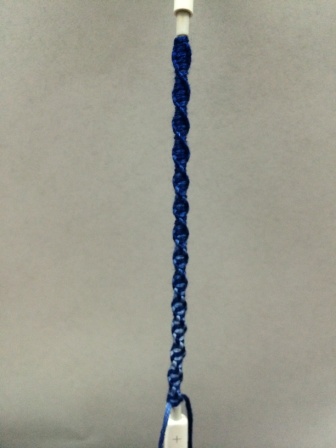
Half-Macrame knot
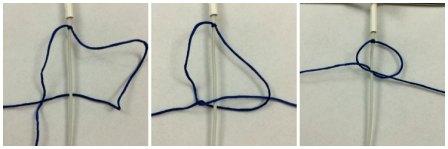
1. Make sure your earbuds is attached to something, a clipboard, or hold it down by tape, to make it easier to work with, start by finding the middle of your string, and putting it behind the cord of the earbuds
2. Start by tying a normal knot where you want to start knotting
3. Place the right string under the cord and over the left string, and place the left string in the loop made by the right string, and pull tight
Repeat this a couple of times, all starting with the right string
4. The strings are going to kind of want to switch places, so slide the right string under the cord, making it the left string, and make the left string the right string, and now again, start knotting with the right string again (which used to be the left string)
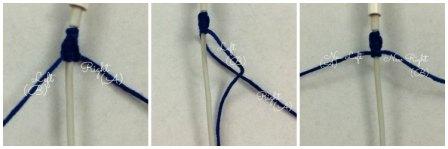
5. You're going to be working with long strings, so i would suggest rolling them up so they don't get tangled, and also, tape the bottom of the cord you're working on to make knotting easier. I would also suggest counting how many knots you make until you switch the strings, so it would be more consistent.
it should look like the string is twirling around the cord...
HAVE FUN!
Editors
The original author of this tutorial is Fr1eNdSh1p_xX but it was also edited by annie4horses, k_marie, Ruby9 and Embracelet.
Uploaded photos (see all 85)


Comments