(( How to... )) An Organized String Kit
| Table of contents |
|---|
| 1 - Plastic String Organizer 2 - Mini Toolbox 2.0 - Upper Compartment 2.1 - Lower Compartment 2 - Other Ideas |
Plastic String Organizer

You can purchase these organizers at any craft store and run about $3 - $4.They are made of plastic and have little compartments in which you can store your string.
When you buy your string, make sure you buy plastic/paper bobbins to wind the string on. You should find these with the string. They also sell floss winders that wind the the floss onto the bobbin - they help a lot =)
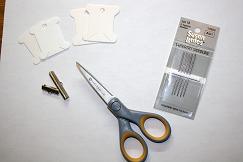
You can also keep other things you need in there, like scissors or needles.
You can clip the bracelet to the box, though a clipboard tends to be much easier.
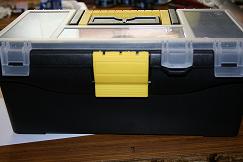
Mini Toolbox
Another option to keep everything together is a mini-toolbox. These can be very inexpensive and practical if you do not wish to wind your thread onto bobbins.
Upper Compartment
Depending on how much you spend on the mini-toolbox it may come with an upper compartment. This is a great place to store safety pins, tapestry needles (for unpicking), scissors, ribbon clamps etc.
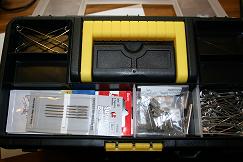
Lower Compartment
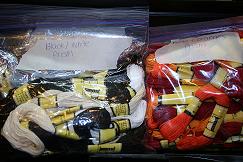
In the lower compartment, store similarly colored string into separate Ziploc bags (these can be labelled). This method is especially great if you have a tendency of buying your string in packs (Prism comes this way).
Other Ideas
For another way to store string and patterns, this one being portable, go to the 'cool and portable way to store friendship bracelets'
Here's a YouTube video with more ideas for those who are interested:
Editors
The original author of this tutorial is xtremebracelets but it was also edited by Maggieee, poplover1997, Gracie04, abbyskigirl, RockePloeger, Foz, Kestrel, k_marie and latios68.
Uploaded photos (see all 6)


Comments