(( Bracelets )) Kumihimo - Odd Number of Strings/ Overlap Technique
Introduction

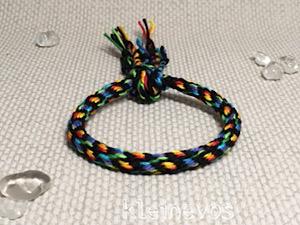
So, I just recently learned how to make this cool bracelet, and wanted to share it with you guys.
Materials
For this tutorial, you will need scissors, a circular loom, and seven strands of embroidery floss or yarn, each about a foot and a half long.
Step by Step
Step 1
First, if you don't already know how to, you will need to make the loom. All you have to do is cut out a circle out of cardboard, cut eight slits around the sides, and poke a hole in the middle. Or use a regular kumihimo disc, and use only 8 of the slots.
Step 2
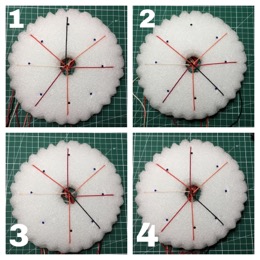
Second, cut seven strands of string, and tie them at the end with a granny knot. Then push this through the hole of the loom. Now put each strand through a slit in the cardboard. There will be ONE slit leftover.
(See below, picture 1)
Step 3
Now that you've set up the loom, we will begin weaving. This is where the empty slit comes in. First, take the strand THREE slots away from the empty slit. In this example, it would be the black strand. Slip this strand into the empty space.
Step 4
Once again, take the strand that's THREE slots away from the new empty space. In this example, it would be the darkest red strand. Slip this strand into the empty space.
Step 5
Repeat steps 3 and 4 until you've made a bracelet. Make sure to comb through the strands to keep them from tangling. You will soon start to see a bracelet in the making through the bottom.
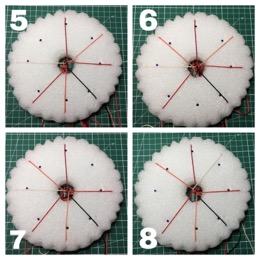
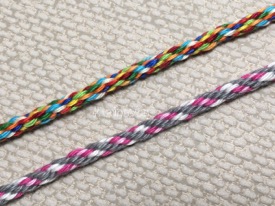
Different amount of strings.
This can also be done with a different amount of strings.
This example shows two 10-string kumihimos, made the same way as the 7-string kumihimo explained above.
What works and what not:
Every ‘multiplication’ of more than 2, minus 2, is the amount of strings that will work with this method.
Example:
1: 3x5-2= 13 strings. In this case you always skip 2 strings. ( The first ‘3’ minus 1)
2: 5x6-2= 28 strings. In this case you always skip 4 strings. (5 minus 1)
3: 4x5-2= 18 strings. In this case you always skip 3 strings. (4 minus 1)
4: 3x2 or 2x3 will not work
Skipping more strings means longer ‘stitches’ and less hollow space inside the kumihimo.
A large amount of strings and skipping 2 or 3 strings for example results in a kumihimo that can be pushed to (almost) flat. And will be harder to keep nice and round without a core inside.
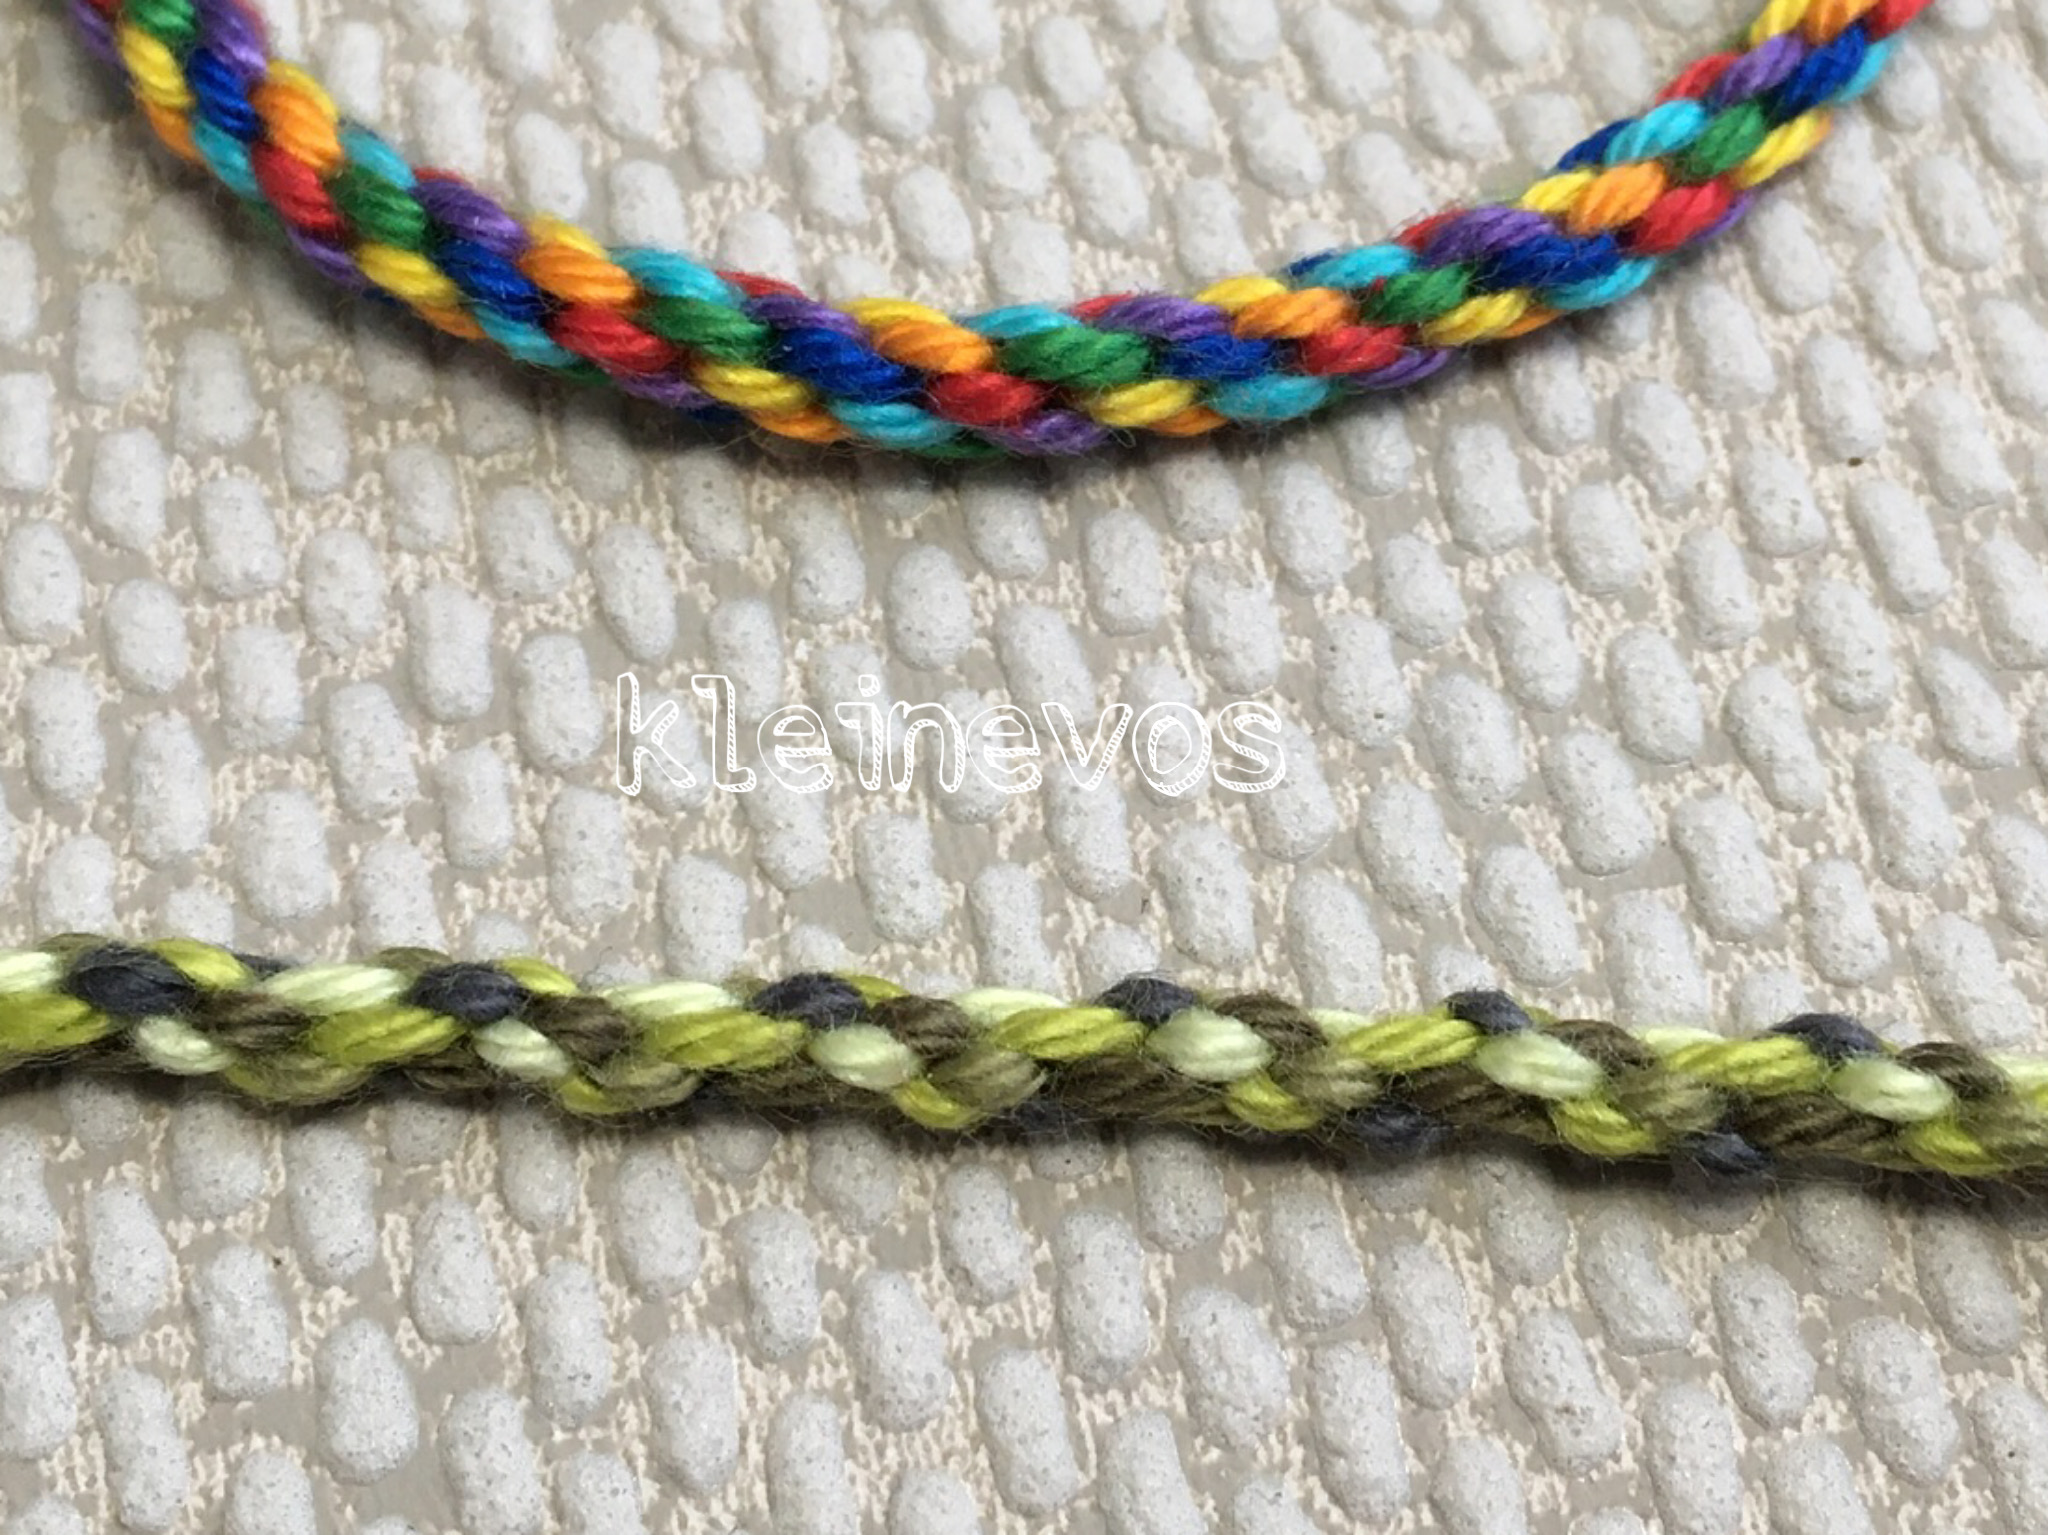
What works, but a little bit different
You can even do this with 5 strings, but that works a bit different:
-Skip 1 string, skip 1 string, skip 2 strings, repeat.
The stitches will differ in length, because of skipping different amounts of string.
Top is 7 strings, bottom 5 strings
Editors
The original author of this tutorial is soaring but it was also edited by Foz, crazycoltsfan, AutumnRane, Alicat and kleinevos.
Uploaded photos (see all 22)


Comments